The level of damage plays a critical role in determining whether to repair or replace your roof. Visible water stains on the ceiling or walls indicate a compromised roof that needs to be repaired quickly to prevent further problems like mold growth and structural damage.
In most cases, roof repair is the preferred option over replacement because it addresses specific issues without affecting other areas of the building. Visit http://fivestarroofingandcontracting.com/ to learn more.
Roof leaks can be a major headache, especially when they occur during or after rainstorms. Fortunately, roof leaks are usually quite easy to spot and can be repaired before serious damage occurs. The first step is to identify the source of the leak and determine whether it needs to be fixed temporarily or permanently.
Leaks can occur in a variety of ways, and the best way to identify them is to look for water stains or dark streaks on your ceiling or walls. In some cases, you may also hear dripping sounds during or after rainstorms. Other common signs of a roof leak are rust on metal flashing or the presence of mold or mildew.
In most cases, a small leak can be easily fixed with roofing sealant. This can be purchased at most hardware stores and is fairly inexpensive. After locating the leak and cleaning the area, you should apply the sealant and cover any cracks or holes. You should then replace any damaged shingles and secure the area with roofing nails and adhesive. It is important to check the area after rainfall to ensure that the repair has been effective.
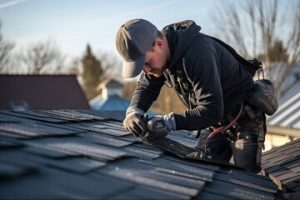
If you are unable to fix the leak yourself, a professional roofing contractor will be able to do it for you. The cost of a roof repair will depend on the size of the job, but most minor repairs can be completed for less than $200.
Larger leaks can be more difficult to spot and can be expensive to repair. It is important to catch them early so that they do not cause further damage and increase the cost of a full roof replacement.
One of the best ways to detect a roof leak is to use the garden hose to simulate rainfall. Start by spraying the area above the suspected leak source and have a spotter inside the house to watch for any sign of water intrusion. If you cannot spot the leak from inside, try using binoculars to examine the exterior of the home for wet areas or dark spots on the ceiling. It is also a good idea to examine any mechanical equipment located at the roof such as swamp coolers, HVAC units, or satellite dishes for signs of leaks.
Damaged Shingles
Your shingle roof is designed to protect your home’s integrity, but a damaged shingle can leave your house vulnerable to water damage. Identifying the signs of shingle damage and acting quickly can help you prevent further roof problems and save money on costly repairs.
Curling or Buckling Shingles
A wavy or buckled shingle is a sign of age or weather damage and can allow water to seep through, leading to interior leaks. In some cases, the shingle may even be completely dislodged from the roof, leaving it exposed and vulnerable to water penetration. If you notice a wavy or buckled section of your roof, contact a roofing contractor to inspect and repair it as soon as possible.
Blistering Shingles
A blistered shingle can expose the fiberglass underlayment and lead to a leaking roof. You can temporarily fix this problem by applying a waterproof sealant to the shingles around the blistered area.
Hail Damage
Bruising is a common problem with shingle roofs and occurs when hail hits the shingles and causes them to break apart. Bruising can also cause the granules that cover your roof to become dislodged, which exposes the asphalt layer and leaves your roof vulnerable. Bruising is usually recognizable as bald spots on the shingles and should be repaired as soon as possible to ensure your roof is protected from storms and other weather conditions.
Sun Bleaching
Over time, your shingle roof can lighten in color due to sun exposure. While this isn’t a serious problem, it can result in a reduced level of UV protection for your roof and can leave the structure vulnerable to water intrusion.
If you notice that your shingles have lightened in color, it’s a good idea to schedule a roof inspection and consider replacing them with new shingles.
When dealing with shingle damage, it’s important to consult with a roofing expert to ensure the proper repairs are made and that any insurance claims are processed correctly. A professional roofer, like The Shingle Master, can conduct a thorough roof inspection and provide an accurate assessment of any damage that may need to be covered by homeowners insurance.
Damaged Flashing
Flashing is a crucial component of your roof that safeguards critical areas such as chimneys, skylights, and intersections where the roof meets vertical structures. It helps to prevent water penetration in these vulnerable areas, preventing costly structural damage and mold growth inside your home. Timely flashing repairs also help to extend the lifespan of your roof.
Strong storms can bend, dislodge, or tear flashing from its position, creating gaps where water may seep in. These leaks can cause damage to walls, ceilings, and insulation in your home. If left unrepaired, this moisture can cause mold and mildew, which can affect indoor air quality.
To repair flashing, carefully remove the damaged sections using a pry bar or utility knife to avoid damaging surrounding shingles or roofing materials. Once the old flashing has been removed, clean thoroughly to eliminate debris and rust before installing the new flashing. A new sealant should be used to ensure that the joint is waterproof.
When repairing flashing, be sure to use a high-quality roofing cement. The type of cement you choose depends on the type of flashing you’re repairing and how it’s installed, such as step flashing, drip edge flashing, vent pipe flashing, or continuous flashing. Follow the manufacturer’s instructions for application.
Once the flashing is installed, inspect it regularly to ensure that it’s secure and that there are no leaks. If you find a leak, spray the area with water from a hose to test for a watertight seal. Repeat the process as needed to ensure that the leak is sealed.
Keep detailed records of your roof flashing repair project, including before-and-after photos and any measurements that you’ve taken. This documentation can be helpful in future roofing projects, warranty claims, or when selling your home. It can also provide a record of regular maintenance, which is important for home insurance coverage.
Damaged Underlayment
Roof underlayment is an important layer of protection that helps prevent water penetration through shingles. When underlayment is damaged, it can allow water to seep into the home, causing water damage and other problems. Recognizing early warning signs of underlayment damage enables homeowners to take prompt action before major structural issues occur.
Water stains on ceilings and walls are an immediate indicator of underlayment damage, with the color and pattern of the stains providing valuable clues about the source of the problem. For example, simple condensation problems typically create light, diffuse marks that spread across the ceiling surface, while underlayment failures often result in darker, more defined marks that expand after rainfall.
Visible mold and mildew growth are another clear sign of underlayment failure. These microorganisms thrive in damp environments and release spores that can cause respiratory and other health problems. Inspect your attic regularly for these telltale signs of moisture infiltration.
A sudden increase in energy bills can indicate that your underlayment has become brittle and allows air to escape. As a result, your heating and cooling systems must work harder to keep the home at a comfortable temperature, causing higher energy costs.
Expert roofers conduct detailed inspections of the underlayment to identify problems that may be hidden from the untrained eye. Experienced contractors look for gaps, overlapping issues, and adhesion problems that can compromise underlayment performance. They also examine seam integrity, identifying areas where the underlayment has become brittle and prone to cracking or tearing.
Underlayment degradation can also be accelerated by extreme temperature changes. Choosing an underlayment material like Tag & Stick that is resistant to UV exposure can help extend its lifespan. In addition, soffit vents and attic fans can regulate temperatures in the attic, which will reduce the likelihood of underlayment degradation caused by drastic fluctuations.
Pests can also damage underlayment by chewing through it to gain access to the home’s interior. Routine attic maintenance and regular pest inspections can help prevent this type of damage. Additionally, keeping trees trimmed away from the house can discourage wildlife like raccoons and squirrels from climbing on the roof and damaging underlayment.