Cabinet Refacing Ideas to Transform Your Kitchen Style

Cabinet refacing is a smart, high-impact kitchen upgrade that offers the same stunning results as a full remodel but for less cost and hassle. Get ready to fall in love with your kitchen again with Sacramento Cabinet Refacing.

With endless options in door styles, finishes, and hardware, refacing allows you to create a custom look with timeless appeal.

cabinet refacing

Beadboard Cabinet Faces

Kitchen cabinet styles play a major role in how your home looks and feels. Whether you’re going for a modern farmhouse, cottage chic, or transitional style, your cabinet door designs are the key element that will set the tone for your entire kitchen design. Fortunately, updating your cabinets doesn’t have to mean full replacements or complicated remodels. Smart DIY projects like adding beadboard cabinet faces can create a high-impact style upgrade for under $300.

Beadboard is a versatile and timeless cabinet material that adds texture to your kitchen. It’s a popular choice for farmhouse, coastal cottage, and transitional kitchen designs and works well with both stained and painted finishes. The vertical lines of beadboard visually expand rooms and introduce a custom flair that’s hard to replicate with builder-grade cabinetry.

If you’re looking for something a little more modern, consider adding beadboard doors with wider bead spacing to give your kitchen a crisp, clean look. This more minimalist beadboard cabinet style is a great alternative to the traditional raised panel door, and it pairs beautifully with sleek hardware for an updated look.

A fresh coat of paint can be the most cost-effective and impactful way to transform your kitchen. Choose from a variety of hues and sheens to complement your space, from matte to glossy, and experiment with accent colors that work with your home’s overall aesthetic.

Wood veneer is an eco-friendly and durable option that combines the best of both worlds: natural wood beauty with enhanced stability. Using thin layers of real wood over a core, you get gorgeous grain patterns without the maintenance concerns of solid wood. You can also opt for a laminate wood finish if you’re on a budget or prefer to skip the upkeep.

If you’re ready to take your DIY project to the next level, contact us today for a free estimate and consultation! We’ll use our advanced technology to apply your new cabinet refacing project in just 3-5 days, delivering superior results that will last for years to come. Our experienced team will provide you with expert guidance to ensure your kitchen renovation meets your exact specifications, and our flexible financing options make the upgrade process even easier.

Shaker Cabinet Faces

Cabinet doors are far more than functional components that conceal and organize pantry items; they’re the very face of your kitchen, dictating its style and ambiance. They can be timeless, trendy, or classically elegant, reflecting your tastes and design philosophy. This is why cabinet fronts are one of the most pivotal choices you can make during a remodel or refresh project.

The Shaker door is a simple, timeless design that fits seamlessly into any kitchen style. It is most commonly found in traditional kitchens, but can also be incorporated into transitional and modern styles. It is a popular choice for homeowners who want to showcase their wood grain or natural finishes.

This cabinet door is often produced from solid hardwood, but can also be manufactured using MDF (medium-density fiberboard). It can be painted or stained, and glazed or unglazed to suit your kitchen’s aesthetic. It can be installed using either full overlay or inset styling.

It’s recommended to pair your shaker cabinets with simple hardware like cup pulls and classic knobs to create a classic, balanced aesthetic. You can even add a subtle sophistication to your Shaker doors by opting for an edge treatment, such as a sophisticated bevel design.

A bevel detail elevates the look of a cabinet door by creating an intricately defined line of light around the perimeter of the frame. This design detail is subtle, but it enhances the beauty of the Shaker door’s clean lines.

Another option for enhancing the look of your shaker cabinetry is incorporating frameless construction, which eliminates a face frame and shows off the innate simplicity of this cabinet style. Frameless cabinetry can be paired with shaker doors for a sleek contemporary aesthetic or used to complement more traditional kitchen designs.

When shopping for new cabinet fronts, it’s important to compare prices and quality. You can save money by purchasing cabinet doors and drawer fronts online or by working with a specialized company that offers refacing services. Before you commit to any company, research online reviews and check references. Make sure your quotes itemize materials, installation labor, and hardware, as well as any tear-out or disposal costs.

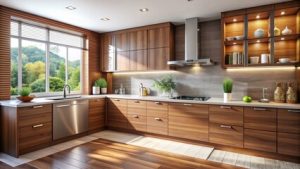
Wood Veneer Cabinet Faces

If you are interested in a natural wood look for your kitchen cabinets, one of the best ways to go about this is by using wood veneer cabinet faces. This material is available in a wide variety of colours, shades, and coatings to suit the aesthetic of your kitchen perfectly. It also enables you to create a bespoke design for your cabinet layout that is tailored to meet the needs of your day-to-day lifestyle.

Veneer wood is created by applying a thin layer of real wood to particleboard or MDF, which allows for the same aesthetic as solid wood at a fraction of the cost. This is particularly helpful if you are looking to achieve an expensive, high-end designer look without breaking the bank.

When deciding whether to use solid wood or wood veneer for your cabinet doors, it is important to consider your preferred aesthetic and the level of durability you are after. Solid wood is a very durable material that will stand the test of time, while a veneer can be more susceptible to damage.

To prepare your existing cabinet for the veneer, it is necessary to sand down the rail and stile edges so that they are smooth. Once this is done, a light coat of primer should be applied to the face frame. After this has dried, it is possible to begin assembling the veneer pieces. First, the vertical front veneer piece is cut to size and then glued to the front of the cabinet door. To ensure a perfect fit, you should use the measurements of the cabinet end pieces to measure the width and height of the vertical front cabinet piece. This information can then be used to cut the appropriate wood veneer sheet.

Once the vertical and horizontal cabinet front veneer pieces have been glued in place, it is necessary to trim any excess material. This can be achieved by using a utility knife. To do this, you should use a straight edge and trim the overlap from both the stiles and rails. Then, you should gently smooth the pressure-sensitive veneer/laminate back down to the rail and stile, ensuring that they meet smoothly.

Glass Cabinet Faces

Glass front cabinets are a modern kitchen trend that is both visually appealing and easy to style. With the ability to showcase decorative dishes and other decor items, these transparent cabinet doors offer a sleek appearance and add a stylish focal point to any room. They are a popular choice for homeowners looking to update their kitchen without spending a lot of money on a major renovation project. However, like all other cabinet options, they come with some pros and cons.

Frosted glass offers a subtle texture that works well in contemporary and modern homes. This type of door allows you to get a glimpse at the contents within your cabinets without having to fully open the doors, making it a great option for homeowners who want to keep their kitchens organized. It also provides an elegant look that works well in both traditional and rustic homes.

For a more dramatic aesthetic, consider opting for textured or etched glass cabinet faces. The patterned designs add depth to your kitchen, while the interplay of light and shadow creates visual interest and a sense of dimension. If you prefer a more minimalist look, a clear glass door is also an excellent option. This allows light to easily pass through the cabinet, illuminating your kitchen while maintaining a sleek and clean appearance.

Regardless of the type of glass cabinet face you choose, you should ensure that your displays are carefully curated. Reserve lower shelves, which are most accessible, for everyday dishware and glassware. Then, use higher shelves for less-used items or more decorative items, such as hand-painted serving platters and vases. This will help to keep your kitchen organized and tidy while allowing you to display unique decorations that truly reflect your style.

When styling your glass cabinet displays, remember that the key to success is keeping it simple. Avoid overcrowding the shelves with too many items, as this can quickly overwhelm a space and make your kitchen look messy and unorganized. Additionally, it’s important to use different textures when displaying your kitchen decor. For example, pairing smooth ceramics with woven baskets or wooden serving trays adds a pop of contrast and character to your kitchen. Finally, it’s important to make a plan for where everything goes so that your family knows exactly where each item belongs.

Interior Painting – DIY Tips And Tricks

Painting your home’s interior is an inexpensive and quick way to upgrade its look. But a good paint job requires preparation to ensure a smooth, consistent finish.

For example, you’ll need to remove hardware like doorknobs and lifts, switch plates, light fixtures, and pictures. Then, cover anything that can’t be moved with plastic sheets. Call Painters In Delaware for more tips and tricks.

painting

Preparation Is Key

Painting a room is one of the most affordable home improvement projects that can dramatically transform your space. However, like any home improvement project, it is important to prepare well before beginning. Professional painters have developed procedures over time to ensure that their jobs go more smoothly and look better, and you can learn from them to save yourself time and frustration.

Before any paint is applied, the surface needs to be cleaned. This includes wiping down surfaces with a damp cloth to remove any dust, grit, or other debris that may affect the quality of your finished product. Using a mild cleanser (such as a solution of dish soap and water) is also helpful for removing dirt, mold, or other grime that may be present on your walls.

It is also a good idea to wipe down windows, trim work, and any other surfaces that you will be painting before starting. This will help you to get the most even and smooth results possible, and it will give you an opportunity to fix any cracks or dings in the walls or ceiling before they are painted over.

After you have completed the cleaning process, it is a good idea to lightly sand your walls with a piece of fine-grit sandpaper. This will create a slightly rough surface that can help the new paint to adhere to it, and it will also eliminate any imperfections in the wall surface.

Finally, you will want to mask off any areas that do not need to be painted (such as trim work or windows). This will protect them from rogue drips of paint and make clean-up much easier later on. Masking paper is usually available in rolls or folded-up squares and can be held in place by static electricity or tape.

It is also a good idea to move any furniture away from the walls and cover it with plastic sheeting to prevent any accidental paint spills on your furnishings. If you do not have the time to move your furniture, at least try to cover it with blankets or old sheets so that it is protected from any paint splatters.

Get The Right Tools

The right tools can make all the difference in a painting project. This is especially true for interior painting, where a quality brush and roller can be the difference between a well-done job and a mess. It is also important to purchase the correct amount of paint for your project. Experts recommend purchasing a gallon of paint for every 400 square feet of wall space. This will give you plenty of room for future touch-up work.

A tack cloth is another must-have tool for prepping surfaces before painting. This inexpensive tool removes dust and debris, allowing for better paint adhesion. Additionally, a tack cloth can be used to smooth rough areas of the wall or ceiling for a flawless finish.

It’s also a good idea to purchase some sandpaper for use with a power sander. This can be used to smooth bumps and dents in the wall or ceiling before applying another coat of primer or paint.

When choosing a paint color, it’s always a good idea to test the paint first on a small area of the wall or trim. This will allow you to see how the paint looks at different times of day and under a variety of lighting conditions. Experts also recommend comparing the color to other decor and furniture in the room to make sure it will look good.

While it may be tempting to skip this step, it is important to protect floors, furniture, and hardware with drop cloths before beginning your painting project. It is also a good idea to lay down tape to help ensure clean lines when painting around trim and baseboards. It’s important to leave the tape on until after the paint dries, as removing it too soon can cause unsightly ridges in your finished paint job.

Once you have the proper preparations and tools in place, it is time to start your painting project. The key is to start at the top and work your way down. Painters also suggest starting with a darker color, as this will help to hide any drips or imperfections.

Don’t Forget The Edges

Painting an interior is a project that requires a significant investment of time and money. It also involves moving furniture, covering items in the room, and making the area essentially unusable until it is finished. So, it is important to make sure that you get the job done right the first time. This is especially true when it comes to the corners and edges of the room. If you want your paint job to look professional, it is essential to learn how to ‘cut in’ the edges of the room properly.

When you are doing this, it is important to use a brush that is designed for edging and corner cutting. These brushes have angled bristles that allow you to get into tight spaces. When you are doing this, it is also important to take your time. If you rush, it can lead to lumpy or uneven lines along the edges of the room. Also, be sure to let the cut-in paint dry before you roll out any more coats of paint on the rest of the wall. This will help ensure that the edges of the room are smooth and do not flake or chip.

Pros usually follow a certain order when they are painting an interior, including starting with the trim before moving on to the walls. This is because it is usually easier to remove the tape from the trim than to pull it up from a wall that is already covered in paint. Another thing that you should do is to be careful when pulling up the painter’s tape. You should always do this at a 45-degree angle to prevent taking any paint with it.

It is also a good idea to keep a supply of touch-up paint on hand, as this can be very useful for any areas that you need to repaint. You can store this in plastic cups or even old glass jars like margarine containers or baby food jars (thoroughly cleaned). If you are doing a large project, it may be a good idea to invest in some small, disposable jars of the paint that you are using.

Use The Right Technique

Painting interior walls and furniture is one of the easiest ways to refresh or update the look of your home. It also offers one of the highest returns on investment when compared to other home improvement projects. Whether you are looking for a simple way to transform your current decor or want to prepare your home for the real estate market, painting is an affordable option that will give your space a quick and dramatic change.

Interior painting isn’t always easy, and there is definitely a right way and a wrong way to do it. Proper preparation is key, as well as knowing what to expect and having the right tools for the job. The last thing you want is a patchy or uneven finish that will be difficult to live with. To avoid this, it is best to hire a professional interior painting contractor who can take care of all your prep work and ensure the result is as smooth and flawless as possible.

Before beginning your project, make sure to sand down any areas that need it, and use a damp cloth to wipe away any dust or debris. You can then choose between latex and oil-based primers depending on the type of paint you are using. Both offer good performance, but there are some differences in their odors and drying times that may influence your choice.

Then, when you’re ready to begin the actual painting, it is best to work in small sections. This will help you keep from getting overwhelmed and will allow you to maintain a wet edge, which is important in avoiding streaking. Make sure to apply thin coats and allow the paint to dry completely between each application.

Lastly, it’s helpful to have a few tricks up your sleeve for any unexpected problems that arise during your DIY project. For example, if you encounter crayon marks on the wall, WD-40 will remove them quickly and easily.

Although the prospect of DIY interior painting can seem overwhelming, with proper planning and the right equipment, you can achieve a great-looking finish that will make your home look fresh and updated. Moreover, the return on investment for this type of project is well worth the effort.

How Replacement Windows Will Affect Your Renovation Project

New windows are easy to open, close, and clean. They provide enhanced energy efficiency and heightened curb appeal to your building or home.

Replacement Windows

Replacement Windows Massachusetts keep cold air out during chilly winters and hot air out, reducing the workload on your furnace and AC unit. They also reduce noise, making your home a quieter place to relax.

A window’s frame is the primary structural component, which also holds the sash (operating or non-operating). Window frames are usually made of wood or vinyl. They may be clad with aluminum, PVC or other factory-applied finishes for protection from the elements and enhanced aesthetics. Frames are often insulated to enhance energy efficiency.

The type of material used for a frame’s construction and its insulation properties will influence the final product’s performance. Wood frames and sash provide superior thermal resistance, but require regular maintenance and are subject to rot. Vinyl and fiberglass are durable, low-maintenance options with good thermal performance. Those with a foam core perform even better.

In general, the frame will determine how well a replacement window performs. It is therefore important to understand the difference between insert and full-frame replacement windows before you make a purchase.

An insert replacement window fits within the existing frame and preserves the original interior and exterior trim. This limits disruption and offers a quick solution without the need to remove existing sash, operating hardware or covers.

For this reason, it is often a simpler option for homeowners to undertake as a do-it-yourself project. However, if the frame is rotted or otherwise damaged, it may be a more complex task than expected.

A full-frame replacement window installs a new head jamb, sill and side jambs that create an entirely new opening for the replacement window. This is the only option if the old frame, sill or jambs are rotting or soft and cannot support a new window.

A full-frame replacement is the best choice if you want to upgrade your existing windows for improved performance and aesthetics, or if you need to replace a window in an area of your home with poor air and water insulation. It’s also the best option if your current frames are made of wood, which provide the highest level of performance but require a high degree of care to protect against the elements. Full-frame replacement windows are available in a wide range of materials, including fiberglass, vinyl and wood clad, to suit your aesthetic preferences and budget.

Glass

Many homeowners choose to replace a window because their current one has broken glass or is in poor condition. They may also want to upgrade the window style, increase efficiency or let in more natural light. It is important to understand the different styles, types and sizes of replacement windows available, and how they will affect your renovation project.

When a replacement window is installed, it forms a tight seal to reduce cold drafts and hot spots in your home. It can also help keep moisture out to avoid mold and mildew. It is a good idea to install replacement windows that are ENERGY STAR certified, which will help save money on energy costs in the long run.

A window frame is composed of the head, jambs and sill that form an exact opening (the frame) for a window sash. A sash is the moving part of a window that lifts or lowers to allow air to circulate.

The sash is supported by vertical and horizontal rails that run the full length of the window. Usually, they are made of wood or metal, but they can be made from other materials, such as vinyl or fiberglass. Depending on the style of window, the number and placement of rails will determine the operation and appearance of the window.

Before installing a new window, it is necessary to remove the existing sash and trim. Then, apply elastomeric caulking to the inside of the window opening and blind stops around the outside. Bore 3/8-inch holes in the sash weight pockets, and spray foam into them. Finally, apply a layer of glazing compound to the grooves of the window pane and install new compound points with the tip of a putty knife every 10 inches.

Some modern windows have insulated glass units (IGUs) with two or more panes of tempered or laminated glass with a spacer between each. This spacer is filled with a noble gas, such as argon or krypton, to improve the window’s energy efficiency. If you’re replacing an IGU, be sure to pay close attention to its NFRC label that shows U-factor and solar heat gain coefficient figures. The lower the numbers, the more efficient the window.

Muntins & Mullions

Whether you’re planning to restore windows in an historic home or want to upgrade the style of your new home with new replacements, the details matter. Understanding the differences between mullions and muntins will help you choose the right components for your project.

Mullions are vertical dividers that separate glass panes in a window frame. They’re often referred to as “dividers” or even “grille bars,” but they differ from muntins in that mullions channel the weight of the windows vertically instead of horizontally. Historically, builders used mullions to support windows, but they’re now primarily used for aesthetics and decoration.

Aesthetics: Decorative elements like a grid pattern can be added to single-pane windows to add detail and eye appeal. When paired with a distinctive color, they can create an elegant focal point for the window. Mullions also allow homeowners to bring new functionality to single-pane windows. With a track, hinges, and an operator installed to the mullion, a single-pane window becomes a casement window that can be opened and closed.

Historically, mullions were essential to supporting large windows, as the walls of homes couldn’t handle the load of large pieces of glass. They’re still a popular choice for bringing visual accuracy to period renovation projects and new constructions that want to capture the spirit of a particular historical style.

Function: When combined with a grid pattern, mullions help block out sunlight and reduce the amount of heat that enters a space. Modern mullions can be ornate and decorative, but they can also be streamlined and minimalist to provide the same structural integrity for smaller windows.

Modern muntins aren’t as ornate and decorative as their traditional counterparts, but they’re a great option for homeowners who don’t want to sacrifice energy efficiency for the look of classic windows. They’re a great alternative to traditional, fixed window grids and are available in a wide range of patterns that match a variety of home styles and decorating preferences, from the classic grid designs of Colonial-style homes to the Victorian style of curved or arched windows and even a modern, minimalist design for farmhouse-style homes.

Installation

Depending on the type of window chosen, installation could take several weeks. Insert replacement windows, for example, are typically custom-made to fit existing openings. While some professionals scoff at this method, many homeowners find that carefully installed insert windows perform quite well for years.

Before starting any work, carefully examine the frame and sill for signs of rot or other damage. If there is, the project should be put on hold until repairs are made. It is also important to ensure that the frame is square, or plumb, and is sound and dry.

The first step in a standard replacement window installation is to remove the interior trim from around the window opening. Carefully pry out the inside stop, sash, and parting stops using a sharp utility knife or nail nippers. Once the old windows are removed, save the interior stop moldings (or cut new ones to size with a miter saw) to reattach to the new window when it is installed.

With the new window positioned in the opening, use wood shims to keep the reveal even at the jambs. Be sure to place the shims behind each screw hole so as not to loosen the screws that hold the window in the frame. With the shims in place, open and close the window to be sure that it is sliding smoothly and aligning correctly where the top and bottom sashes meet in the middle.

If the window is sliding smoothly and aligning properly, install the rest of the screws and apply caulk to seal the joints between the new and existing frames. Use a water-resistant latex caulk for this, and be sure to follow the manufacturer’s instructions on how much caulk to use — too little or too much can cause problems.

In addition to caulking the joints between the new and existing frames, you should also caulk the exposed edges of the exterior frame itself. This helps to reduce air infiltration and condensation, as well as helping the window look neater. Finally, if the sash weight pockets are hollow, spray them with expanding foam insulation to fill the spaces and help the window to seal better.