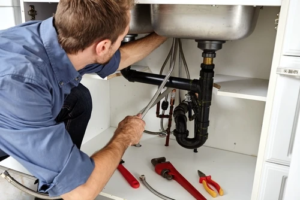
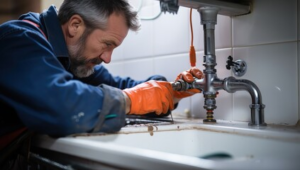
Roofing Contractors

Baton Rouge Roofing Contractors provide design solutions for various roof arrangements, such as shingle replacement, roof repair, and roofing restoration. They also offer maintenance, cleaning, and waste removal services.

Roofing

When selecting a contractor, make sure to request a detailed scope of work that specifies materials, systems, and application methods so that you can compare apples to apples. Ask for proof of insurance accreditation and licensing, as well as product and workmanship warranties.

A roofing contractor is a person who specializes in roof installation and repair. They may carry out the work themselves or employ subcontractors to do it. Regardless of how they operate, they are licensed by their state to perform roofing services.

A contractor with extensive experience in roofing is able to accurately assess the project, estimate the cost and materials needed, and ensure that the job is completed properly. They also know how to handle the many details involved with re-roofing, including dealing with insurance companies and permitting processes.

Storm chasers are a common type of roofing contractors. They typically target areas where a major storm has caused significant damage to roofs. They offer to assist with the insurance process and may even be able to get the claim paid for you. However, they will usually require payment upfront and may not provide any warranty on their work.

Another type of roofing contractors is a general contractor. They are typically very skilled in several types of construction, but may not have the specific expertise to re-roof your home. They can oversee and manage a large team of specialized professionals throughout the construction process. However, they are not the best option for re-roofing your home.

When evaluating a potential roofing contractor, be sure to ask for proof of their licenses and insurance accreditation. Ideally, they will email you a copy of these documents that are easy to verify online. It is also a good idea to ask them whether they use subcontractors and what their insurance coverage is. In addition, a quality roofing contractor will be able to give you a list of references and contact information.

You should also ask the roofing contractor if they are certified by the manufacturer. For example, if they are GAF-certified, this indicates that they are authorized to provide their strongest guarantees and warranties. A roofing contractor should be able to explain the benefits of these warranties. This will help you determine if the company you are considering is worth working with. In addition, ask about the length of their workmanship and product warranties.

Licensing

Depending on where you live, a roofing contractor might need to have state or local licenses. Licensing is an important step in the roofing process because it ensures that the contractor is qualified and meets insurance and bond requirements. Having a state or local license can also increase credibility and make it easier for customers to trust the contractor.

Some states, like Minnesota, require that roofing contractors obtain a Residential Roofing Contractor License from the Department of Licensing and Regulatory Affairs. To apply for a license, you must complete pre-licensing education and pass an exam. Other states, such as New Mexico, require a Commercial Roofing Contractor License. To work in the state, you must register and provide proof of insurance, worker’s compensation, and a surety bond.

Other states, such as Montana and New York, don’t require licensing at the state level but instead defer to local jurisdictions. The reason is that different state laws and lifestyles can vary, from crowded urban communities to rural farmland. The cost of roof repairs and replacements can also differ, which can affect insurance and bond requirements.

Regardless of where you live, it’s essential that you meet all the state or local requirements for roofing contractors before starting any projects. These can include background checks, credit check, age and education criteria, and other qualifications. You may also be required to have liability and worker’s compensation insurance, as well as a surety bond, to be licensed as a roofing contractor.

There are some states, such as Alabama, that require a Commercial Roofing Contractor License to perform any commercial work. To qualify, you must pass a trade and business exam and submit proof of insurance, worker’s compensation, a surety bond, and other documents. In some states, you may be required to take continuing education courses to keep your license valid. These courses can help you stay up-to-date with the latest in roofing technology and practices. This will allow you to offer your clients the best service possible. You can also get more information about the licensing requirements in your state by visiting the state’s website.

Insurance

Roofing contractors need to make sure they have the right insurance coverage. This can include general liability and workers’ compensation insurance. Workers’ compensation is required in most states and helps pay for medical expenses, disability benefits and lost wages if an employee gets injured on the job. General liability insurance is necessary for any business and can cover third-party claims of property damage or bodily injury, including legal fees and settlements.

Depending on the state, there may be other types of insurance that roofing contractors need to carry. For example, some states require commercial auto insurance for roofing businesses that use vehicles for work purposes. This type of insurance usually provides greater coverage than personal auto insurance and can cover employees who drive company cars or trucks.

Errors and omissions insurance, also known as professional liability insurance, protects roofers when they make a mistake that leads to financial loss for a client. For example, if a roofer uses the wrong kind of shingles or misses a critical step in the roofing process, this type of insurance can help cover legal fees and other costs related to the claim.

Another important type of insurance for roofing contractors is tools and equipment coverage, which can help pay for damaged or stolen equipment. This type of insurance is often bundled with general and property insurance policies in a business owners policy (BOP) for small roofing businesses.

As a roofing contractor, it’s important to understand the different types of insurance you need for your business and to stay abreast of local regulations. Getting advice from insurance professionals can help you choose the right policies and save money. For example, you can lower your rates by raising deductibles and bundling multiple policies together. This can help you manage your risks and reduce the cost of insurance while still protecting your business. In addition, implementing safety measures at your business can also reduce insurance costs. This will show that you are committed to reducing your risk and could lead to discounts from some providers.

Warranties

When shopping for a new roof, it’s important to understand what different kinds of warranties are available. This will help you make the best choice for your home, and it will also allow you to better compare the different contractors who offer them. While all roofing contractors will offer some sort of warranty, not all are created equal, and understanding what they cover is vital.

When comparing roofing contractors, it’s also important to consider the length of their workmanship and materials warranties. Workmanship warranties are typically set at two years and guarantee that the work performed will be free from defects for this period. In addition, this type of warranty typically covers labor and material costs for repairing any issues that arise as a result of faulty workmanship.

Manufacturers of roofing products will offer a material warranty that guarantees the durability of their product for a specific period of time. These warranties are generally based on the length of time that you own your home, and may be subject to certain conditions such as proper installation by credentialed roofing contractors or routine maintenance.

Many manufacturers will also provide a system warranty that includes both their product and contractor workmanship. While these are typically more comprehensive than a traditional workmanship and materials warranty, they may also be limited by certain criteria such as the use of only their certified installers and the requirement that the entire system is installed according to their specifications.

Finally, it is important to consider the length of any extended service agreements that your potential roofing contractors are offering. These can be beneficial, but it is important to know exactly what they cover and for how long, as the terms will vary significantly from one company to the next.

It’s also worth noting that any warranties will likely have a specific window of time in which you must register your warranty with the manufacturer. Failure to do so may void your coverage. In addition, any changes made to your roof by a contractor not authorized by the manufacturer to do so could void your warranty. For these reasons, it is important to always choose a contractor who offers both a workmanship and manufacturer’s material warranty for your peace of mind.

Roofing – A Major Home Improvement Project That Creates Strong Return on Investment

Corpus Christi Roofing is a major home improvement project that creates a strong return on investment. New roofing is more resilient to damage and keeps your home more comfortable year round.

Roofers work in all types of weather and are exposed to heat and cold. Keeping your home safe for them is essential. Clear away toys and furniture that can be harmed by falling shingles. Mark or protect any plants that require special attention.

There are a number of roofing materials to choose from, all of which have their own pros and cons. The best roofing material will depend on your local climate, aesthetic preferences and budget. Some materials are better suited to homes in certain climates, while others are more durable and energy efficient.

Choosing a roof material is one of the most important decisions you will make for your home. This will affect how much sunlight and heat it receives, as well as how resistant it is to water damage and other weather conditions. Some of the most popular roofing materials include asphalt shingles, wood shakes and tiles, clay tile and metal. Other options include a synthetic roof membrane and high-density spray polyurethane foam.

Asphalt shingles are the most common type of residential roofing. They are available in a wide variety of colors and styles to match any home. They also offer excellent protection against the elements, including wind and sun. Nevertheless, they don’t last as long as other types of roofing materials, so you will need to replace them regularly.

Slate is another popular roofing material. This natural stone is aesthetically pleasing and extremely durable. It can withstand harsh weather conditions and typically has a lifespan of up to 150 years. Slate is a more expensive option than other roofing materials, but it is worth the investment because of its longevity.

Those on a tighter budget should consider a bitumen roof sheet. These are cheap and easy to install. They are ideal for garages, log stores or sheds and provide excellent waterproofing. However, they are not suitable for flat roofs and can be susceptible to puncture if not fitted properly.

Fibre cement sheets are a more sustainable option that can be used on a range of building styles. They are available in a variety of colours and have one of the longest lifespans of all roofing materials. This makes them a great choice for homeowners looking to invest in a quality roof that will last.

Rolled roofing is a popular alternative to shingles and is suitable for flat or low-sloped roofs. It is affordable, durable and available in a variety of styles to suit your property. It can be walked on without any damage, but should not be hammered down onto flat roofs because this can cause water leaks.

Installation

The installation process for a new roof or reroofing is a complex task that requires specialized skills and knowledge. It involves preparing the roof deck, installing an underlayment, and then applying the roofing materials. It is important to hire a professional contractor for this work because it can be dangerous and require working at high heights.

Before any shingles or tiles are placed, the team will conduct a thorough site survey to understand your home’s unique needs. This includes assessing previous challenges, future expectations, and aesthetic preferences. It also entails understanding the typical weather patterns of your area, which can influence material selection and installation timing.

This crucial first phase also provides insights into the state of your existing roof, including whether it needs to be replaced or repaired. If your roof has suffered extensive damage, the team can recommend either a roof overlay or a complete tear off. The former will cover the existing roof covering without removing it, while the latter will involve tearing off the entire roof and replacing it with a new one.

Maintenance

Dan is a home improvement expert who has written thousands of product reviews and how-to articles. He’s a one-time roofer and serial remodeler, who maintains his Brooklyn brownstone himself. He recommends you inspect your roof on a regular basis, especially from a safe vantage point, to look for rust or other signs of damage. Check the flashing (the strips of sheet metal that waterproof the roof where two sections meet) and around chimneys, vent pipes, and skylights. Also, examine the soffit and fascia for damage or signs of water leakage.

Maintenance crews will be made up of roster personnel that your company can run background checks on.

Repairs

Unlike giving a room a fresh coat of paint or replacing kitchen cabinets, roof repairs are large and time-consuming projects. Roof repair or replacement is the only way to deal with damage that occurs to the shingles, tar paper, and flashing. Roofers use specialized expertise to repair or replace worn-out materials and to seal gaps, cracks, and leaks that allow water and wind to enter the home. This prevents further wear-and-tear, which can lead to larger problems down the road.

Re-roofing, which is when a second layer of shingles is added on top of the old ones, is a popular option for homeowners. However, it’s not as good as a replacement and can be expensive. The second layer of shingles doesn’t fit as well and can be difficult to match. Plus, without removing the old shingles, you won’t be able to see any damage that might exist beneath the surface.

Another issue with re-roofing is that it can void any warranty on the new shingles and shorten their lifespan. If you decide to go this route, be sure to take this into account when calculating your costs. Also, re-roofing often leaves the deck exposed, which can make it more susceptible to mold and other problems.

Wood shakes and shingles offer an organic appearance that adds depth and dimension to your home’s roof. They also offer protection from the elements, including extreme weather and hail, and are resistant to insects and rot. The beauty of wood is that it ages to a distinguished brown or gray color, which enhances your roof’s aesthetics and helps make it stand out among other homes in your neighborhood.

Wooden roofs are usually made of cedar, a durable and strong natural material. Cedar is naturally resistant to insect infestation and rotting, making it one of the most sustainable roofing materials available. Wood shakes and shingles typically last 15 to 30 years before needing replacement.

Although they’re one of the most environmentally friendly roofing options, wood shingles and shakes require more maintenance than other types of roofs. They must be regularly treated with preservatives and protective coatings to prevent rot and mold growth.

When selecting a wood shake or shingle, you’ll want to choose the type that suits your preferences and budget. Wood shingles and shakes come in two varieties: Shakes are thicker and feature a rugged appearance. They’re split by hand, allowing each piece to have a unique grain pattern and ridges that give your home an organic look.

They’re a popular choice for cabins and rustic-style homes, but can be used on any roof. They’re also less expensive than other types of shingles, but they may not be suitable for homes in areas that experience a lot of rain or wildfires.

Benefits of Investing in a Boat Lift

Storing your boat in the water for long periods can damage the bottom and hull. Look for a durable lift made of corrosion-resistant materials such as aluminum or stainless steel.

Boat Lift

The right lift can add value to your property and save you time with easier launch and dry docking. Consider factors such as the type of lake, boat size, and dock width when choosing a lift. Contact Boat Lifts For Sale Near Me for professional help.

While many types of lifts exist, hydraulic lifts are the best for heavy lifting. Powered by Pascal’s Principle, they are able to transfer enormous amounts of force with a minimal amount of effort from the operator. The gist of the principle is that a small amount of trapped fluid can generate massive amounts of pressure, enough to lift an object much heavier than itself.

This equipment is used in a variety of work environments and vehicles for lifting people and things up to heights where they are more easily accessible. They are also useful in places where it would be unsafe to walk or climb, such as in a high-rise building.

The most common type of hydraulic lift is a platform or scissor lift. These are designed with a flat rectangular or square platform on which the load rests. They can be either manual or electric to allow the load to be raised and lowered with the push of a button. There are several variations of these, ranging in height and platform size to accommodate different types of loads.

Hydraulic dock loading lifts are another type of hydraulic lift that is often seen in warehouses or shipyards. They are a safe, efficient, and convenient way to load truck beds from the ground level without having to use ladders or scaffolding. They can be permanently installed on the dock or portable for greater flexibility.

There are many other types of hydraulic lifts for various applications, such as small portable hydraulic lifts that can be used as a mobile work table or a tool carrier. These are able to lift and position items for inspection, shipping, or repair. Many industries rely on them for positioning equipment and workers at an ergonomically appropriate height to prevent back problems or injuries.

Hydraulic lifts are powered by a piston that slides inside of a fixed cylinder filled with hydraulic fluid. The fluid is pumped through the system and is held in the reservoir at one end of the cylinder. When the piston is activated, the fluid is forced out of the reservoir and moves upwards through a series of tubes. This pushes the platform that is attached to the ram and raises it.

Hydraulic Technology

If you’re a boat owner, there are many benefits to investing in a lift. A lift allows you to keep your boat suspended above water level when not in use, protecting it from the elements that can damage it. For example, waves can cause sand, dirt and other debris to fall inside the boat and deteriorate materials over time. Additionally, the oils, paints and other cleaners used on boats can spill into the water, contaminating it. With a lift, these chemicals are kept away from the water and environment, reducing their impact on the surrounding ecosystem.

There are several types of lifts available, each with its own advantages depending on your situation. One type of lift that’s popular among boaters is the cantilever lift. These are typically easy to operate and offer a variety of sizes and cradle shapes to fit different boat makes and models. They’re also ideal for shallow waters.

Another type of lift is the vertical hydraulic lift. These are a bit more expensive than cantilever lifts but offer a number of additional features that make them worth the extra cost. One of the biggest advantages is that they can be operated at full capacity, allowing for a greater boat weight range to be lifted. They’re also more durable and have a long lifespan due to the high-quality construction.

Other features that can be found on vertical hydraulic lifts are adjustable width bunks to allow you to fine-tune the distance between each leg, a stepped channel design to minimize shear loads on the weld and cable rollers for better cable winding. This allows you to adjust cable lengths and eliminates shear loads on the weld when lifting the boat.

For more demanding locations, like those that experience rougher weather conditions, you may want to consider a 4-post conventional lift. These are perfect for a wide range of boats and can handle heavy wakeboard and wakesurf boats, larger pontoons and runabouts. They’re also able to stand up to rough weather conditions like rain, wind and waves without the need for pilings.

Fastest Lifts

If you want to get your boat in and out of the water quicker, then a hydraulic lift is definitely the way to go. They’re designed to be the fastest lifts on the market and can raise a boat up and down in less than a minute.

You’ll also find that a hydraulic lift is better able to withstand the elements. This is important if you live in an area that experiences strong winds and waves.

Another benefit of a lift is that it allows you to save time and money. It eliminates the need to hitch up your boat and haul it to the shore to be stored for the winter. Plus, it can also cut down on the amount of gas you’ll use driving back and forth to your boat ramp.

When it comes to finding a fast lift, there are many different options available. Some are simple, while others are more complex. For example, a cantilever lift is much simpler (one cable on 2 pulleys) but doesn’t work in deeper water. On the other hand, a vertical lift uses cables that run through the frame and is capable of raising your boat to a higher level in deeper water.

Choosing the right lift for your needs is important, so it’s a good idea to consult with local experts before making a decision. They can advise you on the best lift for your home and give you a list of available features. For example, if you have a pontoon boat, then it’s recommended that you consider getting a powerful lift with a durable frame to accommodate the weight of your watercraft.

The most important thing to remember when shopping for a boat lift is that it should be durable and reliable. A lift that’s built to last will give you peace of mind and make it easier for you to enjoy your boating activities for years to come. You’ll want to choose a company that offers a warranty and uses high-quality components. Some manufacturers even offer a lifetime warranty on certain types of lifts.

Safety First

As with any piece of equipment, it is important to follow all instructions when using a boat lift. This includes everything from installing the lift properly, to following proper maintenance guidelines. Following these guidelines can prevent damage and increase the life cycle of your lift. It also helps to ensure that you are not overworking the system, which could cause it to break down.

When operating your lift, make sure that you are aware of everything around you at all times, including other boats and objects. It is also important to pay close attention when maneuvering the boat into the lift, as there are many things that can go wrong during this process. Whether you are in a marina or on your own dock, this is a very important step that should be completed with great care and patience.

Another critical aspect of boat lift safety is understanding how much your lift can handle. Each lift is rated to hold a specific amount of weight, and exceeding this limit can cause damage. This is because the lift is not able to distribute the weight evenly, which can lead to overworking the system and breaking cables.

To avoid this problem, always be sure to weigh your boat before deciding how much lift capacity you need. Also be sure to account for any additional weight from fuel, equipment and batteries. This will help you select a lift that is capable of safely carrying your boat in and out of the water.

When operating your lift, make sure that you never operate it with people in the boat. This is extremely dangerous and can lead to fatal injuries. Additionally, it is a good idea to leave the boat lifted when you are not in it to protect it from damage from marine life and weather conditions.

Landscape Lighting – Create Drama After Dark

Landscape Lighting Orlando adds a whole new dimension to your yard after dark. It can help highlight your favorite features, like a fountain or a herringbone walkway.

The first step to selecting the best landscape lighting is determining why you want it. From there, you can narrow down your options and find the power type that best fits your needs.

There are many benefits to landscape lighting, but the most obvious is that it enhances your property. It makes your outdoor space usable at night and increases the visual impact of your home’s exterior. Lighting can highlight features like fountains, ponds, gardens, patios and pergolas. It can also bring out the beauty of trees, shrubs and flowers in your yard. In addition, a well-lit home will look more inviting to guests and may increase your property’s value when it comes time to sell.

When selecting your lighting, it is important to consider the style you want and your budget. There are many different light fixtures available, so finding one that meets both your needs and your price range shouldn’t be difficult. Many light fixtures are also available in a wide variety of finishes, so you can find something that compliments your landscaping and home’s architectural style.

Uplighting – Lights can be positioned underneath the canopy of a tree or other tall structure to create drama with shadows. This technique can also be used to highlight a wall or other vertical surface in an entertainment area. Beam spread or beam angle is another factor to consider, as it determines how much light a fixture casts. Fixtures with a wider beam spread can cover larger areas, but will require more power than those with a narrower beam.

Path lighting – Using a series of lights placed along a path can help make your landscaping easier to navigate at night. Ideally, the lights should be spaced about six to eight feet apart to maintain visibility and create a vivid effect.

Decorative or special purpose lighting – Lights with an integrated LED board are designed to be a permanent fixture in the landscape, similar to a garden light. These types of fixtures are often less expensive than those that take a bulb, but they are more limited in terms of customization options such as brightness (lumens), color temperature and beam spread.

Most landscape lighting uses low voltage systems, which are safer and more affordable to install than line voltage systems. Low voltage systems utilize a transformer to reduce 120-volt household power to a safer 12 volts. As a result, there are a wide range of possibilities for landscape lighting, from the ethereal moonlight beamed down on a tree canopy to a subtle glow that washes over a low garden wall.

Accent Lighting

Accent lighting, also known as highlighting, is used to draw attention to specific areas in your home or landscape that are meant to stand out or create a specific mood. It can be a great way to showcase artwork, sculptures and other decorative elements in your home as well as highlight your favorite plants and trees. This type of lighting can be achieved using sconces, pendants, tube lights and spotlights.

One of the most important aspects of accent lighting is that it should be three times brighter than the ambient/general lighting to provide contrast. It is also important that you have the right fixtures in place to achieve the desired effect. This is where the expertise of an experienced lighting designer comes in handy as the choice of fixture and color of light is vital to achieving the desired effect.

When done correctly, this type of lighting can make an object or feature look three-dimensional. It can also be a great way to highlight structures in your home such as a staircase or a walkway. Adding accent lighting can also help guide people around your property, particularly in the event of a power outage or bad weather.

Outdoor accent lighting is a great way to illuminate a staircase, pathway or driveway and provide safety for your family members. It can also be used to highlight the unique features of your home’s exterior such as a stairway, patio or fountain. This can help you stand out from your neighbors and increase the resale value of your property.

Having good quality accent lighting is crucial for your home’s safety and security. It is best to have the right amount of brightness to avoid glare. You should also choose the right fixtures for your property based on the atmosphere you want to evoke. If you are looking to add accent lighting to your home, contact us at Livingetc to learn more about how we can help.

With the proper lighting, your Austin home can become a place of beauty and ambiance that is sure to impress any visitor. It can also enhance the comfort and enjoyment of your family. Whether it is basking in the soft glow of your garden or taking in the sights and sounds of your water feature, well-designed lighting can turn your backyard into an oasis of peace.

Spotlighting

Landscape lighting is an excellent way to showcase your home’s best features and create drama after dark. It can be used to highlight outdoor living spaces, fountains and water features, ponds, trees, garden accents, and even the architectural details of your home. It’s the perfect solution to bring out the ambiance of your property at night and impress friends, family, and guests with its beauty.

However, just like any type of home improvement project it is important to plan and budget for your landscape lighting before jumping in. Whether you’re looking to add subtle accents or dramatic focal points, there is something out there to fit your needs and your budget. It is also recommended to work with a professional, especially when installing line voltage or high-powered fixtures. In the worst case scenario, you could seriously injure yourself if the wiring is not properly buried and connected or if you end up selecting the wrong bulb for your fixture.

The most common types of lights used in landscape lighting are path and spotlights. Path lighting is great for walkways, but it can also be used to illuminate flowerbeds and other low areas. Spotlights are usually directional, shining downward with a wide aperture (width). They are great for uplighting trees and other points of interest in your yard.

Another popular technique is silhouetting, which involves positioning a light at the base of an object or structure and aiming it towards an adjacent wall to create a shadow effect. This works best on densely packed plants and structures that have a clearer silhouette.

It is also possible to use hardscape lights, which install into or onto structures and wash or graze the walls with light. These are often seen in courtyards, patios, and decks.

Not only does landscape lighting look beautiful, but it can also increase your property value. Studies have shown that well-maintained landscaping is one of the top things home buyers look for when evaluating a property. Investing in landscape lighting is one of the easiest ways to make your home’s exterior stand out from the rest and increase its overall value.

Ring Lighting

Unlike spotlights, which have a beam angle between 40 and 75 degrees, ring lights provide an almost circular glow. This type of landscape lighting is best for highlighting a specific object or area, such as a statue or patio. It’s also well suited to macro photography and flower shots because the circular light eliminates shadows that can spoil an image.

Most landscape lighting systems are low voltage, which means they have a step-down transformer that reduces 120-volt household current to a safe 12 volts. This makes them easier and cheaper to install than line-voltage systems, which require a licensed electrician. However, even low voltage landscape lighting can be dangerous if you don’t understand how to install it properly.

While there are many benefits to installing landscape lighting, it’s important to consider your specific needs and preferences when choosing a style and system. For instance, some people prefer the look of incandescent bulbs while others like the energy efficiency and color options offered by LEDs. In addition, the lighting you choose should be compatible with your home’s existing fixtures and the outdoor environment you want to illuminate.

When designing your lighting, it’s crucial to take into account the size of your yard or garden as well as any other competing light sources, such as streetlights and nearby buildings. A professional can help you determine what type of landscape lighting will work best for your space.

Landscape lighting is a great way to add curb appeal to your home while improving safety and security. However, it’s important to remember that this type of lighting is only effective when used in combination with other light sources, such as natural sunlight and supplemental indoor lighting. It’s also essential to use outdoor lighting sparingly so that it doesn’t create an unwelcoming glare or overpower your home.

If you’re thinking about adding landscape lighting to your home, consider working with a professional who can design a customized system and expertly install it. While this may be an expensive option, it’s one that will provide long-term benefits for your home’s value and aesthetic.

Become a Plumber – A Career With Real Job Security and Good Pay

Are you interested in a career with real job security and good pay? Plumbers assemble, install and repair pipes and systems that deliver water and carry waste away from homes and businesses.

Sink Drain Replacement Olmsted Falls often work on new construction projects and must follow blueprints to lay pipe. They may also be called upon to advise customers on best practices for plumbing maintenance.

Plumbers work with pipes, fixtures and appliances to ensure water supply, waste disposal and heating systems function properly. They also help install new plumbing systems in construction projects. Plumbers may work on residential, commercial and industrial projects. They must have a good understanding of building codes and regulations.

Some plumbers specialize in a specific area of the field. For example, a commercial plumber may work with sewage and drainage systems while a residential plumber is more likely to focus on water pipes and fixture installation. Plumbers can choose to be self-employed or work for a company. They must maintain their skills and keep up with new technologies. Some plumbers become teachers or tutors to pass on their knowledge.

The responsibilities of a plumber include identifying problems, providing estimates, performing repairs and maintenance and ensuring all work is compliant with relevant codes. Identifying potential problem areas and addressing them before they become a issue can help reduce costly repairs in the future. Other important responsibilities are responding to emergency calls, communicating clearly with customers and collaborating with other contractors.

Depending on the job, other duties may include maintaining tools and equipment, cleaning up workspaces and preparing periodic status reports. Plumbers must be able to read blueprints and diagrams and understand the principles of electricity and gas. They also must be able to handle multiple tasks at once and remain calm under pressure.

If you are looking to hire a plumber, it is important to draft a detailed job description that includes all the requirements and responsibilities of the position. This will help ensure that you are hiring the best candidate for the job. The job description should also include the expected salary or hourly rate. This will give applicants an idea of what the role pays and help them make a decision about whether or not they can afford to work for your company.

Some people get their start as a plumber by going through a formal apprenticeship program. This involves classroom studies and on-the-job training under a journeyman plumber. Apprentices earn while they learn and usually have to work for a minimum number of years before they can apply to become a journeyman plumber themselves.

Education Requirements

There are a few different paths to becoming a plumber. Some people choose to attend a plumbing vocational/technical school and earn a certificate, while others take an apprenticeship and gain on-the-job training under the supervision of a journeyman plumber. Regardless of the route, it is important to have a high school diploma or equivalent and pass a background check prior to starting work.

Most states require plumbers to be licensed, which typically entails passing an exam on the basics of plumbing systems and local codes and restrictions. It is a good idea to research your state’s requirements before beginning a career as a plumber, as each one may have slightly different criteria.

Some apprenticeship programs offer classroom instruction, in addition to hands-on training. This is a great way to learn more about the theory behind plumbing and to complement your practical experience. This classroom training usually includes topics like local plumbing codes and regulations, blueprint reading, and safety practices. Apprentices also typically earn a percentage of the wage of a journeyman plumber while they are learning the trade.

Since plumbers work directly with clients, it is important that they have strong customer service skills. This means that they must be able to listen to customers’ needs, answer questions, and explain complicated problems in an easy-to-understand manner. It is also helpful for plumbers to have basic mechanical knowledge, as well as an understanding of electrical wiring diagrams and schematics.

The physical demands of this job are moderate to heavy, with frequent lifting, carrying, and bending. It is important for plumbers to have a full range of motion in order to use manual and power tools. They also need to be able to stand for extended periods of time, as they often work in cramped spaces. Because plumbers work with dangerous materials and machinery, it is essential that they wear proper safety equipment at all times. This includes safety goggles, gloves, and a hard hat. It is also recommended that plumbers take a first aid course.

Licensing Requirements

There are several paths to becoming a plumber, from getting an apprenticeship to earning a plumbing degree. Most states require plumbers to be licensed before they can work independently, which is necessary to ensure that they have the skills and knowledge required to perform safe and effective plumbing installations. Many states also have specific requirements about where a plumber can work and what types of plumbing projects they are allowed to take on.

Many people enter the plumbing industry through an apprenticeship program, which combines classroom instruction with on-the-job training. This can take four to five years, and it is a great way to learn the practical aspects of the trade. Many apprenticeship programs are sponsored by trade unions, and they usually offer financial benefits as well.

After you have completed your apprenticeship, you can become a journeyman plumber. To qualify for this title, you need to have a minimum of 8,000 hours of hands-on experience and pass a state exam. You must also supply affidavits from master plumbers who can attest to your years of experience and character. These affidavits must be signed and notarized, and they should include the dates that you worked for them, a description of your duties and jobs, and the number of hours that you worked.

Plumbers often work with customers, so it is important for them to have excellent customer service skills. This includes being able to explain complex plumbing problems clearly and concisely, listening to the client’s concerns, and answering any questions that they may have. They also need to be physically strong enough to lift heavy equipment and tools.

Because plumbing is a dangerous occupation, it is important that plumbers follow all local and state safety rules. This includes wearing protective clothing and using the correct tools for each job. Plumbers must also be able to read blueprints and understand construction and building codes. They must be able to identify and correct unsafe conditions.

The demand for plumbers is expected to grow, which is good news for those who are interested in pursuing a career in this field. However, it is important to remember that the job outlook depends on a variety of factors, including the economy, housing market and the availability of skilled labor.

Work Environment

Plumbers work in a variety of environments. They often travel to different job sites and may work in tight spaces and outside. They also must be able to work with different materials, and they must know building codes and regulations. They typically work full-time, but they may have to be on call at certain times for emergencies. Plumbers can find employment with small companies or large corporations, and they can choose to specialize in residential or commercial projects. In addition, they can choose to run their own plumbing business. This is a good option for those who are self-motivated and enjoy working with their hands.

Liquid Waste Disposal

Liquid Waste Disposal Perth is vital to maintaining environmental sustainability and public health. It involves the collection, treatment, and disposal of various liquid wastes from industrial, commercial, or domestic activities.

Some liquid wastes require extensive treatment before they can be disposed of safely. Such treatments include: screening, sedimentation and aerobic processes.

Methods of disposal

Liquid waste disposal involves the treatment and dumping of liquid waste materials that can pose a threat to the environment and human health. Such wastes may be generated in factories, households, and agricultural sites. They include sewage effluent, waste water, industrial chemicals, oil-based paints, edible and motor oils, and other liquid byproducts.

The most common way to dispose of liquid waste is through landfills. However, this type of disposal is prone to a number of problems, including the risk of toxic substances leaching into groundwater and the possible explosion of dangerous gases in landfills.

This is why it is important to consider alternative methods of disposal, such as incineration and waste-to-energy processes. These alternatives not only ensure that liquid waste is disposed of in a safe and environmentally friendly manner, but also helps to reduce the amount of waste that goes into landfills.

Many liquid waste disposal techniques involve screening and separation. This is done to remove large particles and non-organic contaminants. The resulting material is then separated into different categories, depending on its chemical composition. The most contaminated wastes are then sent for more intensive treatments.

Some of these treatments are more effective than others. For example, the use of disinfectants is crucial for removing harmful pathogens and preventing diseases in the environment. Common disinfection methods include chlorination and UV disinfection.

Other methods of liquid waste disposal include land application and deep-well injection. Land application entails spreading the liquid waste across land, which can be used as a fertiliser or for crop irrigation. Another option is to inject the liquid waste into deep wells, which can be used for groundwater remediation.

This method is especially useful for hazardous liquid wastes, such as those containing chemicals and acids. In the case of acidic waste, incineration is particularly effective, as it can be converted into ash and gases through high-temperature combustion. The ashes can be used as an alternative fuel, and the gases can be utilized for energy production.

Another method of disposal is called solidification, which is used for non-hazardous liquid waste. In this process, binding agents are added to the waste until it forms a compact and rigid solid. This is then shipped to approved landfills or waste-to-energy facilities for incineration and energy generation.

Despite these methods, it is important to remember that the most suitable disposal method depends on the specific substance and its properties. For example, the use of incineration for sewage and other domestic waste is not recommended, as it could pollute groundwater.

In addition, it is important to find a disposal method that complies with local and federal regulations. The best way to do this is to work with a liquid waste disposal company that has a facility equipped for the proper treatment of all types of waste. This can help to avoid fines and other penalties that may be imposed on businesses that are not following the appropriate guidelines. Also, working with a company that recycles and reuses its own waste can save money and resources in the long run.

Hazardous waste disposal

The way in which liquid waste is disposed of can have a significant impact on the environment. This is why it is important to follow proper disposal practices and dispose of the waste correctly. There are several ways to dispose of liquid waste, including incineration and landfills. Alternatively, you can use biological treatment methods to convert the waste into organic fertilizer. However, it is important to determine whether the waste is hazardous or non-hazardous before proceeding with any disposal method. Hazardous wastes contain substances that can harm the environment and people if they are released into the water. They also have to be handled and disposed of according to strict guidelines set by law. This is because they can pose a danger to human health and can cause diseases and toxic exposure if inhaled or ingested. There are many different types of liquid waste that can be considered to be hazardous, from oil and grease to raw chemicals and controlled substances. Some of these are easily identifiable by the symbols found on the label, such as flammable, poisonous or gas under pressure. Other examples include detergents, paint thinners and wood preservatives.

Some types of liquid waste can be treated and recycled, such as flammable liquid waste, which can be converted into industrial fuel. This method of disposal has the advantage of reducing the risk of environmental contamination. In addition, it can reduce the amount of hazardous waste that ends up in landfills. The only drawback is that it can take a long time for the process to complete.

Another type of liquid waste can be treated with chemical disinfection to prevent the spread of disease. This method involves mixing the waste with strong chemical disinfectants and rinsing it to remove the chemical residue. This method is effective for waste that can be shredded to ensure good contact with the disinfectants. Other ways to treat hazardous waste include land application and biological treatment. The former involves spreading the waste on a tract of land and adding microbes that can metabolize it. The site is then covered with a layer of soil and the process is monitored to ensure that the waste is not leaching into groundwater.

Biological treatment of liquid waste includes the use of microbes to break down the chemicals and nutrients. This method is a cost-effective and environmentally friendly option for disposing of organic liquid wastes. It is also an efficient option for converting sewage into fertilizer. It can also be used to break down contaminated soils. The only drawback is that the process can take a long time to complete and is not suitable for large volumes of liquid waste.

Another option for discarded liquids is to store them safely in sealed containers until they can be disposed of properly. This can be done by using collection days for household hazardous waste (HHW) or buying and storing less toxic alternatives. You can also try reusing empty containers and taking your old paint cans to the recycling center.

In this study, backwash flows of intensive recirculating aquaculture systems were captured and dewatered in simple geotextile bag filters. The biosolids were amended with polymer plus alum, ferric chloride, or hydrated lime to evaluate how coagulant choice impacts nutrient and carbonaceous biochemical oxygen demand (cBOD5) leaching from the filtered effluent and the final composition of bag-captured biosolids.

Alum-treated biosolids showed the highest removal of total suspended solids (TSS), followed by lime and ferric chloride. In contrast, adsorption of organic acids and cBOD5 were significantly higher in the hydrated lime and ferric chloride treatments. This indicates that adsorption of organic acids is critical for effective treatment and degradation of dissolved nutrients in geotextile bag filters.

As a result, a simple and economical geotextile bag filter may be able to effectively bind dissolved phosphorus in aquaculture sludge for disposal by land application or composting. However, the alum and hydration treatments did not prevent the mineralization of DRP within the bag filter. As a result, a significant amount of phosphorus was released into the filter filtrate.

A newer and more advanced technology is the use of a dewatering tower, which allows the bag to be lifted and pushed by gravity to create an air-filled space at the bottom of the bag. The air-filled space forces the sludge to expand, and it is squeezed out of the bottom of the bag, producing a much drier cake in less time than traditional methods.

How to Prevent and Minimize Water Damage

Water Damage Los Angeles CA can be destructive, expensive and even dangerous. It can also cause long-term problems like mold, mildew and rotting wood.

Water Damage

Many water damage incidents are preventable. Performing regular maintenance on appliances, such as washing machines and refrigerator hoses, can help prevent problems.

It is also important to check the hygrometer frequently. High humidity can contribute to hidden leaks and moisture buildup.

Water damage is often a result of natural disasters like flash floods and heavy thunderstorms, but it can also be caused by manmade incidents such as damaged appliances, faulty plumbing fixtures or broken pipes. The best way to avoid extensive water damage is through vigilance and prompt action. Incorporate a water damage prevention plan into your regular home maintenance routine to minimize the risk of costly repairs and loss of property value.

Conduct Routine Walk-throughs – Inspect the interior and exterior of your home at least twice per year for signs of moisture damage. Watch out for discoloration on ceilings and walls, soft spots in flooring and the sound of dripping or rushing water. Check frequently-used areas, such as basements and attics, for leaks and mold growth.

Keep Water Out – Ignoring even small leaks can quickly lead to the spread of mold, mildew and dry rot, which can cause substantial structural damage to your home. In addition, most standard home insurance policies will not cover damage that is the result of neglect.

Consider Leak Detection Sensors – Water damage sensors offer a cost-effective solution for early warnings of hidden leaks throughout your home. These easy-to-install devices monitor and transmit temperature and humidity data to your smartphone, alerting you to problems that can’t be detected by visual inspections.

Create a Seasonal Preparation Plan – Ensure that your home is ready for the winter by draining outdoor hoses and disconnecting water supply lines, as well as installing ice dam barriers around gutters and downspouts. Make sure to clean out your gutters regularly, and be sure to remove any fallen leaves or debris that could block water flow during a storm.

Develop a Response Plan – Prepare your family for potential emergencies by creating a water damage response plan that includes shutting off the water supply, calling emergency professionals and documenting damage to support insurance claims. Encourage all family members to learn the location of water shut-off valves and how to operate basic household appliances.

Commercial buildings and industrial facilities can also benefit from a preventive water damage plan. A thorough building inspection can identify vulnerable components such as the roof, windows, doors and walls (the “building envelope”) that are prone to moisture intrusion.

Identifying the Source

Water damage can result from natural disasters like floods and storms or from manmade causes such as plumbing issues. It can be slow and imperceptible, such as a water spot that slowly marles a surface, or it can be sudden and catastrophic such as flooding caused by burst pipes. Either way, it is important to know how to identify water damage in order to prevent or minimize the damage.

One of the most obvious signs of water damage is a musty or mildewy odor. This is because the water can carry bacteria and other contaminants that may make you and your family ill. The odor is also a good indicator of how long the water has been present. If the odor is strong and lingering, it is likely that the water has been in the house for a while and needs to be addressed quickly by a professional.

Another sign of water damage is discoloration in the walls or ceiling. This is because the water can cause the drywall and wood to warp. It is also important to note if any areas of the house are sagging. This is because it could be a sign of a leak in the roof or wall studs.

It is important to carefully inspect adjacent rooms when looking for signs of water damage. It is not uncommon for the source of the leak to be in a room other than where it is visible. For example, a wall with water damage in the downstairs bedroom may actually be from a leaky upstairs bathroom.

It is also helpful to know what type of water it is that you are dealing with. There are three categories of water damage: Category 1 water, Category 2 water, and Category 3 water. Category 1 water is clean, potable water that does not pose a health risk. Category 2 water is gray water that contains contaminants that can lead to illness if ingested. Category 3 water is black water that carries serious diseases and should only be handled by professionals. Fortunately, most homeowners insurance policies cover the cost of cleaning and restoring property damaged by water.

Cleaning Up

Water damage is one of the most common issues homeowners face. It can happen due to floods, burst pipes, construction-related issues or appliance malfunctions. No matter what the cause, it can lead to serious underlying issues like mold and mildew. Therefore, it is important to act quickly and get the issue fixed before the damage worsens.

Before beginning the cleanup process, ensure that the electricity is switched off in the affected area. Electrical wires and cables are often exposed and can create a lethal risk if they come in contact with water. Furthermore, you must also switch off the gas supply if it has been turned on.

The next step is to remove any items that are soaked or have been damaged by the water. This includes furniture, carpeting and rugs as well as books and papers. If possible, try to move these items into dry areas like garages or porches. It is also a good idea to place dehumidifiers in the area to speed up the drying process.

You should then determine which items are salvageable and which cannot. Any items that have come into contact with raw sewage or flooding waters must be discarded as they can’t be disinfected. This also applies to items that can’t be washed and dried such as mattresses, pillows, cosmetics, baby toys, upholstered furniture and drywall.

Once you have removed any items that are unsalvageable, it is time to start cleaning up. It is important to wear protective clothing and use gloves, masks and goggles during this stage. This is because flood water can contain a wide variety of bacteria and viruses that pose a health hazard.

It is also a good idea to wear rubber boots and waterproof gloves as these can help prevent slipping in the muck. You should also use a wet/dry vac to remove excess moisture from the floor and walls. Lastly, it is a good idea to use industrial air movers as opposed to regular fans to speed up the drying process. It is important to be careful during this stage as it can take up to 24 hours for mildew and mold to grow after water damage.

Repairing the Damage

Water damage repair involves the restoration of damaged materials and systems to their pre-water condition. This typically includes removing and replacing all porous materials, disinfecting the affected areas to prevent mold growth, and using specialized equipment such as flir thermal imaging cameras and hygrometers to measure moisture levels in building materials. Professionals also use a variety of pumps, dehumidifiers, and extraction wet vacuums to remove excess water from the site and speed up the drying process.

Class 1 water damage is characterized by minimal water absorption and a lack of contaminants. This type of damage is usually caused by clean rainwater, or by a washing machine or dishwasher leakage. It is usually possible to dry this type of damage with little or no difficulty.

Once the source of the water has been identified and stopped, the water removal and evaporation process can begin. However, it is important to know that water can continue to damage materials even after the initial evaporation. That is why it is vital to take the time to assess all areas of the home or building for water damage and to make necessary repairs as soon as they are needed.

Water that has been allowed to linger can cause structural damage, as well as damage personal belongings and other materials in the home. In addition, it can create a health hazard in the form of mold and bacteria. In some cases, the moisture lingering behind walls and under floors can even be toxic to occupants’ health, especially children and elderly people.

If you are considering purchasing a home with existing water damage, it is essential to get professional estimates for the repairs that will be required. These estimates can be used to negotiate a price with the seller or as evidence of the need for certain repairs as part of an insurance claim. It is also recommended to consult with a licensed home inspector to learn more about the extent of the existing water damage and any potential health hazards that may be present. This will allow you to make an informed decision about whether or not the property is a good buy.

Integrating Smart Technology For Optimal Insulation Efficiency In Green Buildings

Integrating smart technology into green buildings can make them more eco-friendly, energy-efficient, and comfortable for occupants. These Perth Insulation technologies can be implemented during construction or retrofitted to existing structures.

To qualify as smart technology, devices must offer a tangible convenience and deliver energy savings. Keeping these devices up to date, understanding compatibility issues, prioritizing cybersecurity, and having backup systems are important.

insulation

Prevent Heat Loss

Keeping a comfortable temperature throughout the home or business requires more than just a traditional thermostat. It also requires proper insulation and a variety of smart devices. Incorporating smart technology can prevent heat loss in homes and businesses, reduce energy bills, and create a more sustainable future for the planet.

Smart building technologies allow users to monitor and manage energy, HVAC, lighting, and security systems from a remote location. They enable real-time data analytics and automation that can help to drastically reduce energy usage utility costs and carbon emissions.

These innovations offer a range of benefits, including enhanced convenience through voice control and automation, entertainment options with streaming services, health tracking for valuable insights, and energy savings through optimizing device usage. However, these smart devices can also bring about several challenges. Initial installation costs and ongoing fees, privacy concerns due to data collection, compatibility issues with other devices, a risk of overdependence on technology, technical glitches or security vulnerabilities, and the need for extensive knowledge of how to use these smart devices effectively.

Fortunately, there are ways to mitigate these problems and reap the rewards of integrating smart technology for optimal insulation efficiency. By taking the time to research and plan carefully before installing a smart system, you can ensure that your new technology works as intended and that you can enjoy all of its benefits.

When compared with conventional insulation, smart insulation is more effective at preventing thermal bridging and air infiltration. In addition, this advanced type of insulation is also safer and more cost-effective than traditional materials. Designed for the needs of commercial buildings, smart insulation is available in different sizes and specifications, making it an excellent choice for architects, contractors, and other professionals.

Many people worry that installing smart technology will be costly and difficult to manage. However, there are a few simple ways to integrate smart technology into a home or business without breaking the bank. For instance, homeowners can start by using low-tech items such as smart plugs and power strips. These devices allow homeowners to automate devices like fans, lamps, slow cookers, curling irons, and space heaters. They can also be remotely controlled, voice-activated, and programmed to save energy when not in use.

Reduce Energy Bills

Smart technology allows individuals to monitor and control their energy usage from anywhere, and it can also offer the ability to customize settings based on individual preferences. Additionally, many of these devices can be connected to virtual assistants like Amazon Alexa and Google Assistant, allowing users to easily control them with voice commands.

The goal of smart technology is to help reduce energy bills and promote environmentally responsible use of natural resources in residential, commercial, and industrial buildings. These technologies are transforming building energy efficiency practices, and they can also help businesses achieve their sustainability goals, as well as provide a range of other benefits.

Some of the most popular smart energy efficiency solutions include smart thermostats, energy monitoring systems, and intelligent power management solutions. These systems are capable of reducing heating and cooling costs, as well as saving money by avoiding unnecessary consumption. Many of these solutions can be integrated with existing systems to automate and streamline processes.

IoT devices can also be programmed to learn from a user’s behaviors and preferences, which helps them optimize energy usage without compromising comfort. For example, a smart thermostat can be programmed to automatically adjust temperature levels throughout the day based on historical patterns. This can be especially helpful for those who work a shift-based schedule or travel often.

Other smart technology includes smart insulation, which can be a cost-effective way to improve building performance. The technology offers the same thermal resistance as traditional products while reducing manufacturing, shipping, and installation costs. It also has a built-in guide system that provides a visual indicator showing operators on the monitor where to attach and remove each module, ensuring an accurate fit while boosting productivity.

Finally, smart plugs can be used to disconnect devices from power when they are not being used, preventing wasted energy in the form of standby power and eliminating wasteful energy consumption. Smart sensors are becoming increasingly cost-effective and can be used to monitor a variety of different environmental parameters, including air quality, water temperature, and humidity.

Although smart technology has a wide variety of applications, it’s important to remember that not all smart devices are created equal. For example, some may be incompatible with each other and are not able to communicate with each other. For this reason, it’s best to stick with devices that are compatible with one another and can communicate with the rest of the system.

Sustainability

The future of ecological sustainability in built environments largely depends on the effective deployment of smart technologies. Integrating smart insulation solutions into green buildings can make them more eco-friendly and energy-efficient.

Smart technology is a term that encompasses Internet-connected devices that use sensors to monitor and analyze data, draw conclusions from preprogrammed rules, communicate with other intelligent systems, and act accordingly. These systems are increasingly being used in a variety of applications, including building energy management, automation systems, and home security.

The integration of smart technology into energy-efficient building systems offers immense potential for optimizing energy consumption and enhancing occupant comfort. However, challenges such as interoperability, data security, and scalability need to be addressed effectively. By advocating for standardization, prioritizing cybersecurity, adopting modular integration approaches, and focusing on user acceptance, these challenges can be overcome to unlock the full benefits of smart technology in energy-efficient building systems.

Integrated monitoring allows homeowners and building managers to track energy usage patterns and implement energy-saving measures without needing to be onsite. This can help reduce utility costs, promote energy-efficient practices, and contribute to sustainable development in the residential housing sector.

When smart devices are grouped, they form a network called a smart device system or a smart grid. They can detect changes in environmental parameters that affect the whole system, such as a pipeline leak or higher electricity demand in a local power grid, and respond appropriately. For example, they can shut down a pipe, switch off air conditioning, or activate reserve power generators.

Integrating smart technology in energy-efficient green buildings can help achieve sustainable development goals and contribute to a cleaner, safer world. Using innovative green insulation techniques, such as stone wool, helps improve the thermal efficiency of structures. It can also reduce carbon emissions and fossil fuel consumption, making a real contribution to reducing climate change.

Energy-efficient green buildings must have a comprehensive strategy to reduce energy consumption and emissions, such as strict environmental sustainability plans and implementing efficient smart technologies. Using smart insulation solutions is an important part of this plan, as it can help reduce energy consumption by preventing heat loss and improving occupant comfort. Moreover, smart insulation can be constructed with bio-green materials such as grasses and plants that are more environmentally friendly than traditional construction materials.

How Replacement Windows Will Affect Your Renovation Project

New windows are easy to open, close, and clean. They provide enhanced energy efficiency and heightened curb appeal to your building or home.

Replacement Windows

Replacement Windows Massachusetts keep cold air out during chilly winters and hot air out, reducing the workload on your furnace and AC unit. They also reduce noise, making your home a quieter place to relax.

A window’s frame is the primary structural component, which also holds the sash (operating or non-operating). Window frames are usually made of wood or vinyl. They may be clad with aluminum, PVC or other factory-applied finishes for protection from the elements and enhanced aesthetics. Frames are often insulated to enhance energy efficiency.

The type of material used for a frame’s construction and its insulation properties will influence the final product’s performance. Wood frames and sash provide superior thermal resistance, but require regular maintenance and are subject to rot. Vinyl and fiberglass are durable, low-maintenance options with good thermal performance. Those with a foam core perform even better.

In general, the frame will determine how well a replacement window performs. It is therefore important to understand the difference between insert and full-frame replacement windows before you make a purchase.

An insert replacement window fits within the existing frame and preserves the original interior and exterior trim. This limits disruption and offers a quick solution without the need to remove existing sash, operating hardware or covers.

For this reason, it is often a simpler option for homeowners to undertake as a do-it-yourself project. However, if the frame is rotted or otherwise damaged, it may be a more complex task than expected.

A full-frame replacement window installs a new head jamb, sill and side jambs that create an entirely new opening for the replacement window. This is the only option if the old frame, sill or jambs are rotting or soft and cannot support a new window.

A full-frame replacement is the best choice if you want to upgrade your existing windows for improved performance and aesthetics, or if you need to replace a window in an area of your home with poor air and water insulation. It’s also the best option if your current frames are made of wood, which provide the highest level of performance but require a high degree of care to protect against the elements. Full-frame replacement windows are available in a wide range of materials, including fiberglass, vinyl and wood clad, to suit your aesthetic preferences and budget.

Glass

Many homeowners choose to replace a window because their current one has broken glass or is in poor condition. They may also want to upgrade the window style, increase efficiency or let in more natural light. It is important to understand the different styles, types and sizes of replacement windows available, and how they will affect your renovation project.

When a replacement window is installed, it forms a tight seal to reduce cold drafts and hot spots in your home. It can also help keep moisture out to avoid mold and mildew. It is a good idea to install replacement windows that are ENERGY STAR certified, which will help save money on energy costs in the long run.

A window frame is composed of the head, jambs and sill that form an exact opening (the frame) for a window sash. A sash is the moving part of a window that lifts or lowers to allow air to circulate.

The sash is supported by vertical and horizontal rails that run the full length of the window. Usually, they are made of wood or metal, but they can be made from other materials, such as vinyl or fiberglass. Depending on the style of window, the number and placement of rails will determine the operation and appearance of the window.

Before installing a new window, it is necessary to remove the existing sash and trim. Then, apply elastomeric caulking to the inside of the window opening and blind stops around the outside. Bore 3/8-inch holes in the sash weight pockets, and spray foam into them. Finally, apply a layer of glazing compound to the grooves of the window pane and install new compound points with the tip of a putty knife every 10 inches.

Some modern windows have insulated glass units (IGUs) with two or more panes of tempered or laminated glass with a spacer between each. This spacer is filled with a noble gas, such as argon or krypton, to improve the window’s energy efficiency. If you’re replacing an IGU, be sure to pay close attention to its NFRC label that shows U-factor and solar heat gain coefficient figures. The lower the numbers, the more efficient the window.

Muntins & Mullions

Whether you’re planning to restore windows in an historic home or want to upgrade the style of your new home with new replacements, the details matter. Understanding the differences between mullions and muntins will help you choose the right components for your project.

Mullions are vertical dividers that separate glass panes in a window frame. They’re often referred to as “dividers” or even “grille bars,” but they differ from muntins in that mullions channel the weight of the windows vertically instead of horizontally. Historically, builders used mullions to support windows, but they’re now primarily used for aesthetics and decoration.

Aesthetics: Decorative elements like a grid pattern can be added to single-pane windows to add detail and eye appeal. When paired with a distinctive color, they can create an elegant focal point for the window. Mullions also allow homeowners to bring new functionality to single-pane windows. With a track, hinges, and an operator installed to the mullion, a single-pane window becomes a casement window that can be opened and closed.

Historically, mullions were essential to supporting large windows, as the walls of homes couldn’t handle the load of large pieces of glass. They’re still a popular choice for bringing visual accuracy to period renovation projects and new constructions that want to capture the spirit of a particular historical style.

Function: When combined with a grid pattern, mullions help block out sunlight and reduce the amount of heat that enters a space. Modern mullions can be ornate and decorative, but they can also be streamlined and minimalist to provide the same structural integrity for smaller windows.

Modern muntins aren’t as ornate and decorative as their traditional counterparts, but they’re a great option for homeowners who don’t want to sacrifice energy efficiency for the look of classic windows. They’re a great alternative to traditional, fixed window grids and are available in a wide range of patterns that match a variety of home styles and decorating preferences, from the classic grid designs of Colonial-style homes to the Victorian style of curved or arched windows and even a modern, minimalist design for farmhouse-style homes.

Installation

Depending on the type of window chosen, installation could take several weeks. Insert replacement windows, for example, are typically custom-made to fit existing openings. While some professionals scoff at this method, many homeowners find that carefully installed insert windows perform quite well for years.

Before starting any work, carefully examine the frame and sill for signs of rot or other damage. If there is, the project should be put on hold until repairs are made. It is also important to ensure that the frame is square, or plumb, and is sound and dry.

The first step in a standard replacement window installation is to remove the interior trim from around the window opening. Carefully pry out the inside stop, sash, and parting stops using a sharp utility knife or nail nippers. Once the old windows are removed, save the interior stop moldings (or cut new ones to size with a miter saw) to reattach to the new window when it is installed.

With the new window positioned in the opening, use wood shims to keep the reveal even at the jambs. Be sure to place the shims behind each screw hole so as not to loosen the screws that hold the window in the frame. With the shims in place, open and close the window to be sure that it is sliding smoothly and aligning correctly where the top and bottom sashes meet in the middle.

If the window is sliding smoothly and aligning properly, install the rest of the screws and apply caulk to seal the joints between the new and existing frames. Use a water-resistant latex caulk for this, and be sure to follow the manufacturer’s instructions on how much caulk to use — too little or too much can cause problems.

In addition to caulking the joints between the new and existing frames, you should also caulk the exposed edges of the exterior frame itself. This helps to reduce air infiltration and condensation, as well as helping the window look neater. Finally, if the sash weight pockets are hollow, spray them with expanding foam insulation to fill the spaces and help the window to seal better.

Water Heater Repair – Signs That Your Water Heater Needs Repair

First, check to make sure your unit has power. If not, reset any tripped circuit breakers and replace any blown fuses. If your water is hot, but the tank has a rusty appearance or smells, it may be time for an anode rod replacement. Contact Water Heater Repair Aurora CO now!

Water Heater Repair

This helps prevent corrosion and can save you money on energy costs.

If your water isn’t as hot as it usually is, there’s a good chance that the water heater needs to be repaired or replaced. Something may be wrong with the thermostat, but it could also mean a problem with the dip tube. This tube transfers cool water from the top of the tank to the bottom, where it can be reheated. A damaged dip tube can cause cool water to mix with the hot, reducing your overall water temperature.

Another common sign that your water heater isn’t working properly is if you have to turn your shower dial up higher and higher to get the same hot water. This is a sign that your water heater is working harder than usual, which means it’s using more energy. It might be time to hire a plumber to replace the water heater.

Other warning signs include a strange smell or discoloration in your water. The odor may be caused by a rotting anode rod, or the discoloration may result from minerals or other substances in your water. If you notice a foul smell or strange color in your water, drain your water heater and see if the problem goes away.

Lastly, if you’re hearing loud banging or rumbling noises from your water heater, it’s time to call in a plumber. This is a sign that the tank is beginning to rust or that it’s developing a leak.

It’s also important to note that older water heaters are more likely to break down than newer ones. If your water heater is nearing the 15-year mark, it might be wise to replace it instead of trying to fix it. The cost of a new water heater is typically less than the repair costs associated with an older model.

Over time, your building’s water heater could accumulate a fine layer of sediment in its tank from the minerals and other particulate matter possibly present in the city or well-water supply. If left unaddressed, this can wreak havoc with your water-using appliances and result in costly repair and replacement expenses. Fortunately, there are certain warning signs that you can watch out for that will alert you to sediment in your water heater’s tank.

One of the first indicators that you may have a sediment buildup in your water heater is a puddle or pool around the base of your hot water tank. If you see this, shut off the hot water heater and drain it by connecting a hose to your water tank’s drainage valve and draining it onto a light-colored patio or similar location that won’t be damaged by the hot water escaping from the hose during the flushing process. If you are unsure about how to drain your water heater safely and thoroughly, it’s best to contact a professional plumber for assistance.

Another common indicator of sediment in your water heater is a sudden rise in energy bills. When a water heater is clogged, it has to work harder to heat the water, which leads to increased energy consumption. Lastly, sediments can cause the storage tank to rust due to the reaction between oxygen and the sediment particles.

If you notice discolored or rusty water flowing from your showerhead, this is another clear indication of sediment buildup within the tank. When rust is introduced into your hot water supply, it can contaminate it and lead to unpleasant tastes and smells.

You might also notice rumbling or popping noises from your water heater if there is a lot of sediment in the tank. As the sediment heats up and expands, it can agitate the walls of your water heater and irritate the gas or electric components of the appliance. If this continues, the tank may eventually rupture. If you notice any of these problems, call us right away for immediate help with water heater repairs and maintenance.

The area around your hot water heater should always be dry. If you notice puddles or dampness near your unit, cut off your water supply and call a plumber specializing in water heater repair. Whether the puddles are a leak, they can indicate a problem with your tank or a broken component, like the drain valve. Using a paper towel, test the area for moisture. If the puddles are evenly spread around your water heater, they’re likely condensation and not a sign of a faulty unit.

If you hear sounds like rumbling or popping, your water heater may leak. It could also be overheating due to a buildup of sediments that overheat the bottom of the tank. If left unchecked, this can lead to the tank cracking and a flooded home.

Water leaks can damage your home’s structure, but they can also hurt your wallet and cause health issues for you and your family. For instance, a leaking water heater can lead to mold growth, which will not only ruin your indoor air quality but also damage the surrounding surfaces and structures of your home.

Leaks can occur anywhere, and a small leak can quickly turn into a flooding issue. In addition to causing water damage, a leaking water heater can waste energy and lead to high utility bills.

Many homeowners don’t think much about their water heaters—as long as they work, they’re out of sight and out of mind. However, when your water heater breaks, it can destroy your entire routine and make life miserable for you and your family.

To avoid a cold shower, watching for these signs of a failing water heater is important. If you notice that your water heater isn’t heating, make sure the pilot light is lit and that there are no gas outages in your neighborhood. If the problem persists, it’s best to call a plumber specializing in water leak detection and repair. They’ll inspect your water heater, determine the cause, and fix it as soon as possible.

The rotten egg smell that occasionally comes from your hot water heater can be a sign that bacteria is eating away at your tank’s inner lining. This is most common in older, untreated well water systems. The odor results from naturally occurring ions in your water supply called sulfates that have a taste for stainless steel. As the sulfates snack on your metal tank, they transform into hydrogen sulfide gas. Hydrogen sulfide is the same foul-smelling vapor found in sewers, septic tanks, oil and gas wells, and volcanic eruptions.

This stinky odor can also be the result of a faulty anode rod. Anode rods are a sacrificial piece of metal that draws the minerals and corrosive buildup away from your tank’s lining so that the lining doesn’t rust. Unfortunately, some of the most popular anode rod materials — like aluminum and magnesium — also react with the sulfur ions in your water to produce that familiar rotten egg smell.

If you’re experiencing the rotten egg odor from your hot water heater, a professional can flush and sanitize your tank to eliminate the problem. They can also replace your anode rod with a more cutting-edge model that uses a zinc-aluminum alloy that doesn’t react with sulfates to produce hydrogen sulfide.

A sulfur smell or rotten egg odor from your hotwater can also be the sign of an electrical issue within your water heater. The electrical contact switches on the outside of your water heater can wear down over time and start to discharge continuously, causing hot spots that burn plastic parts inside your water heater.

If you notice this smell, it’s important to turn off your hot water heater immediately and then call a plumber for expert help. You’ll need to shut off the gas and open your windows and doors to let any remaining gas dissipate before you can safely reignite your pilot light. A professional can often replace the damaged switch and restore your water heater to normal function. If the odor is coming from your gas line, however, you’ll need to contact a gas company or emergency services for immediate assistance.