How to Choose a Residential Roofer

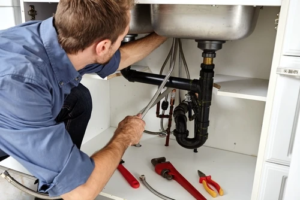
Residential roofers work on the roofs of single- and multi-unit homes. They know about different roofing materials and can install or repair most residential roofs.

Roofer

A well-chosen and properly installed roof can protect a home, add value to the property, and enhance its beauty. Choosing the right residential roofer requires thorough research and evaluation of qualifications. Contact Roofers In Columbus GA for professional expertise.

Residential roofers repair and replace the roofs of single-family homes or multi-unit housing complexes. They also work on other types of buildings, including schools and hospitals. In addition to installing and repairing roofs, they also inspect and assess the condition of existing roofing systems and provide estimates for new roofing systems. Roofers need to be efficient, work safely in high places, and be able to interact with clients to discuss project details and address concerns.

Experienced roofers have a solid understanding of building codes and standards and can install energy-efficient materials. They are also familiar with the different roofing materials available and can recommend options that fit your home’s style and budget. They can also help you choose a shingle color that will complement your home and increase its value.

If you are considering hiring a roofing contractor, look for someone with positive online reviews and referrals from friends and family. Read these reviews carefully, as negative ones are an indication that the company may have a problem with customer service. Additionally, make sure that the roofing company you hire offers a warranty on their work and is licensed by your state.

Many large companies specialize in roof repairs and replacements, offering a range of services. They typically have a dedicated point person on site to answer questions and to interface with the crew. These people often offer a variety of financing options and can be helpful in navigating the insurance process. However, they tend to focus on larger jobs and may be less interested in providing a great customer experience.

A reputable roofer should have a solid track record of working with local homeowners and businesses. They should be able to handle multiple projects at once and have the tools and equipment needed to complete them in a timely manner. They should also be able to work in a variety of weather conditions and be comfortable working in high places.

Residential roofers can sometimes break into commercial roofing, but this is usually a challenge because it requires a higher skill set and different client expectations. In addition, it is often more time-consuming than residential roofing. It is also important to understand that there are different payment terms, and it can take a while for you to receive payments for your work.

License

When choosing a residential roofer, it’s important to find one who has the proper license and insurance coverage. These requirements vary by state, so it’s important to check with your local authorities for the specific guidelines in your area. Additionally, it’s crucial to choose a roofing professional with the right skills and experience for your project. This will ensure that your roof is in good hands and that you’re receiving the best value for your money.

To obtain a roofing contractor’s license in Alaska, applicants must first complete pre-licensing education and submit the required documentation. They then need to pass the examination and provide proof of liability insurance and workers’ compensation coverage to meet the state’s requirements. In addition, Alaska requires roofers to register as specialty contractors with a roofing classification. Those who do not comply with the state’s licensing regulations may be subject to stiff fines or imprisonment.

While the road to becoming a residential roofer can be long and arduous, the process is well worth it. The benefits of this career include a solid salary, flexible hours, and an opportunity to advance in the field. In addition, a roofer’s license provides a good standard of workmanship and safety, and it protects homeowners from fraudulent contractors.

Commercial roofers have different skill sets than residential roofers, as they work with larger-scale projects that require more complex roofing systems. In addition, commercial roofers must understand the multitude of material options and how to properly repair and patch them all. Residential roofers, on the other hand, work primarily with asphalt shingle roofs and require less specialized skills.

When selecting a residential roofer, you must carefully evaluate the qualifications and prices of each candidate. It is also important to ask about any warranties and guarantees that the roofer offers. In addition, you should check that the roofer has worker’s compensation and general liability insurance. Finally, you should choose a residential roofer with excellent customer support practices. After all, a great roof is the foundation of a home, so it’s critical to find someone you can trust with your investment.

Insurance

Homeowners understand that accidents happen, and they often prefer to engage with roofing professionals who carry general liability insurance. This type of policy covers third-party property damage, bodily injury, and advertising injuries, among other risks. It may not cover all losses, however; if you’re sued for a large sum due to an unavoidable accident, the homeowner can tap into their own personal assets and insurance to cover the costs. This is a risk homeowners don’t want to take, and they may ask you for proof of general liability insurance before you perform any work.

Besides general liability, roofers also need workers’ compensation insurance for employees injured at the workplace. This type of insurance reimburses employees for lost wages and medical expenses. It also protects them from lawsuits that could arise out of a workplace-related injury. Depending on local laws, this type of insurance might be mandatory for roofing businesses.

Errors and omissions insurance, sometimes known as professional liability insurance, is another policy that may be useful for roofing contractors. It covers the legal fees and damages if a client sues you over your advice or recommendations, even if they don’t succeed in proving that you were negligent.

Other types of insurance that may be beneficial for roofing companies include commercial auto insurance, business owners policy (BOP), and builder’s risk insurance. The former provides coverage for vehicles and equipment used for business purposes, which is usually excluded from a personal auto insurance policy. The latter protects against damage and loss if a building under construction is damaged by an unexpected event, such as a hailstorm or hurricane.

The cost of roofing contractor insurance varies based on the policy’s coverage needs, limits, and claims history. Other factors that can influence the cost include the number of insured employees, your business location, and the size of your payroll. You can also save money by purchasing a combined business owners policy that covers general liability, commercial auto, and property insurance all in one policy. A deductible, which is the amount you agree to pay out of pocket before the insurance company starts covering expenses, may also affect your premiums.

Pricing

Residential roofers can charge different prices depending on the material they use, the size of your home, and whether you’re having an insurance-related repair or replacement. The geographical area can also influence the cost, with some areas having higher or lower costs due to local materials, housing costs, and weather conditions.

If you’re repairing or replacing an existing roof, the roofing company may include the cost of any underlying problems in their estimate. This can include issues like rotting wood, mold growth, or missing shingles. These underlying problems can add up to significant additional costs. The roofer should explain any underlying issues to you and give you a complete list of the work that’s needed.

Service roofers focus on servicing homeowners in their areas, and their crews are able to respond quickly to calls. They can handle both insurance and non-insurance jobs and offer a wide range of options, including ENERGY STAR roofing materials. They often have a salesperson who can help you sort through your options and choose the best options for your situation. They may offer long-term warranties and high-quality materials at competitive prices.

Retail sales roofers do normal roof replacements and usually have a dedicated customer service department. Their sales presentations can be up to four hours long, and they’ll start with their highest-priced options. You’ll have to negotiate hard for the pricing you want. They’ll likely offer you financing, and their terms are typically better than those of service roofers.

Storm chasers are primarily insurance-focused and follow storms around the country. They’ll go door-to-door after a tornado, hurricane, or hailstorm and offer to do an insurance check of your roof. They can offer a quick turnaround and are well-known for taking care of the insurance process. They’re also known for offering low warranties and cheap materials.

You can sometimes finance a new roof through a personal loan from a bank or credit union. However, this method can carry high interest rates and can put your home at risk if you’re not able to pay back the loan. You can also borrow money from a family member or take out a home equity loan, which will allow you to access a line of credit that you can use for other home improvement projects.

What Does a Plumber Do?

Plumbers Stroudsburg PA install, repair, and maintain pipes and fixtures that facilitate water distribution and waste removal in residential and commercial buildings. They must be able to read blueprints and understand complex plumbing systems.

Plumbers often work with customers, so strong customer service skills are important. They must also be able to listen to complaints and provide solutions that are both effective and cost-efficient.

Plumbing is the system of pipes that transports water and waste in homes and businesses. Plumbers install and repair these systems to ensure they function correctly. They must be knowledgeable about a wide range of topics, including pipe fittings, plumbing codes, and construction techniques. Plumbers typically begin their careers by completing an apprenticeship program or vocational school program that provides hands-on training and classroom instruction. After gaining experience in the field, they may decide to pursue additional certifications or licensing.

A plumber’s job duties include inspecting a home or business to determine the best location for pipes and other equipment. They will look at the layout of the space, factor in any existing appliances and fixtures, and then lay out a plan for the new pipes and their locations. During the installation process, they will also make sure that all required permits are obtained and that the work complies with local codes.

Before beginning the actual work, a plumber will put down plastic sheeting to protect the floor and walls. They will then open up the path for the new pipes by removing any drywall or tiles. This can be a messy job, but it is necessary to ensure that the plumbing system will be installed properly. In addition, plumbers need to have access to a variety of tools and materials, such as power drills, soldering equipment, pipe cutters, and professional-grade sealants.

Once the rough-in plumbing is complete, the plumber will connect the pipes to the existing fixtures and test the water flow to ensure everything works properly. This is a crucial step, as any errors during this stage can cause major problems later on. Once they are satisfied that the plumbing system is functioning as intended, the plumber will seal up the holes and clean up their work area.

There are several different types of plumbers, each with their own specialties. Some plumbers focus on residential plumbing, while others work on commercial or industrial projects. Still others specialize in specific types of plumbing equipment, such as gas systems or steam heating systems. Most states require plumbers to obtain a license before they can practice in the field, and this usually requires passing an exam and meeting certain education or experience requirements. In addition, plumbers must carry liability insurance to protect themselves from property damage and injuries on the job.

Maintenance

Plumbing systems are a vital component of building functionality. Though often overlooked in comparison to electrical and mechanical systems, plumbing failures can be costly and disruptive events that need to be prevented. A plumbing maintenance process allows facility managers to identify and address issues before they become serious problems, keeping buildings running smoothly and efficiently.

The most effective method for reducing the need for costly repairs is through proactive maintenance. The aging and expected useful lives of pipes should be factored into the development of a maintenance schedule. Pipes should be inspected at least annually to ensure that water flow is not compromised. This can be accomplished by creating a maintenance checklist with the more critical systems being inspected and maintained first, followed by less critical areas.

Using an online plumbing management system, such as ClickUp, to create plumbing maintenance checklists is an effective way to keep track of these inspections and tasks. The customizable platform offers a variety of tools to streamline workflow, including the ability to create, customize, and require forms to be filled out by technicians while in the field. This helps to promote accountability and reduce paperwork errors.

Another benefit of a plumbing maintenance program is that it allows facilities to monitor the water usage and costs. By incorporating plumbing into the preventative maintenance process, technicians can inspect water meter readings and look for issues that may be impacting efficiency, such as leaks, clogs, or high water pressure. This can be used to identify areas of concern and determine whether they need to be replaced or rehabilitated.

A plumbing maintenance team can also conduct a thorough cleaning of sewer lines and septic tanks. This can help to reduce the risk of clogs and other plumbing problems caused by tree roots, sewage backups, or other factors.

A plumbing maintenance program is a great investment in the health and longevity of your home’s pipes, water heater, and other fixtures. By following these steps, you can rest assured that your plumbing will continue to function properly and your house will remain safe and comfortable for years to come.

Troubleshooting

When a home plumbing problem occurs, it is important to take prompt action. Otherwise, the problem could worsen and lead to costly repair bills. Many plumbers have experience in troubleshooting and can diagnose issues before they become serious. However, sometimes troubleshooting requires more than just looking at a pipe or faucet. Observing other symptoms in the house can help identify the cause of the problem. These clues can help a homeowner save time and money by preventing unnecessary trips to the plumber.

Leaky pipes are one of the most common plumbing problems. They can cause high water bills, damage wood and masonry, create breeding grounds for bacteria and cockroaches and may lead to expensive repairs. Leaky toilets are also problematic and may cause significant damage to the structure of a home or the surrounding area. This type of problem is easy to fix with some basic tools and the right know-how.

Another common problem is clogged drains. These can be caused by hair, dental floss, food waste or other debris. Depending on the severity, a homeowner can try using a drain snake or plunger. In severe cases, a sewer system backup or septic tank problem might be the culprit. This is a more serious issue that needs to be handled by a professional.

In some instances, a commercial plumbing problem may require the services of a licensed plumber. This can be due to complex issues that involve gas or other specialized equipment. However, many problems can be prevented through regular inspections and maintenance. Promoting responsible use of the plumbing systems in a business can also go a long way toward reducing the need for plumbers. For example, educating employees on what can and cannot be flushed in the toilets can help prevent blockages and other problems. When the unexpected happens, these simple troubleshooting tips can help a business owner get back on track quickly.

Customer Service

Providing superior customer service is key to a plumbing business’s success. Plumbers who prioritize this aspect of their business build trust and loyalty with customers, which ultimately leads to more sales. In addition, plumbers who focus on customer service are more likely to receive positive online reviews that can boost their reputation and grow their business.

Ensure a Positive Customer Experience

When potential clients call a plumber’s office, they expect to speak with an empathetic and friendly team member who can answer their questions and schedule a timely appointment. Using automated call center software like ServiceTitan can help your CSRs answer calls quickly and accurately, and make sure each call is handled in the most efficient manner. It also helps to have plumbing call center scripts on hand so your CSRs can offer the right information to each client over the phone.

Once a plumber has a job scheduled, they should do their best to adhere to the appointment timeline and complete the work in a timely manner. In addition, they should keep the customer updated on any changes to their original estimate and provide transparent cost breakdowns. This enables customers to trust their plumbers and increase satisfaction with the service provided.

A quality customer experience is also important for retaining existing customers and increasing referrals. To do so, plumbers should provide exceptional work, follow up on past jobs, and continuously improve their services by gathering customer feedback. Additionally, they should develop relationships with other professionals and businesses in related industries to increase their customer base.

With the industry experiencing significant growth, there are plenty of opportunities for plumbers to succeed in their businesses. With the proper training and a strong focus on customer service, plumbers can deliver excellent results while building long-lasting relationships with their clients. For more tips and guidance, check out our blog post on transforming your plumbing business into a high-performance organization! If you are ready to take your plumbing business to the next level, schedule a free demo with our team of experts today. We’ll show you how FieldEdge can help you improve customer satisfaction and grow your plumbing business!

The Benefits of Body Butter

Body butter are thick, occlusive moisturizer packed with good-for-you oils and deeply hydrating ingredients. They’re ideal for dry skin or in the colder months.

Body Butter

Body butter is packed with skin-loving oils and shea butter, known to deeply moisturize the skin and replace natural oil lost due to dryness. It is also hydrating, so it helps to restore the natural barrier that protects the skin from harsh weather conditions and environmental stressors. This intense hydration helps to prevent dryness and flakiness, leaving the skin feeling smooth, soft, and nourished. Visit Website to learn more.

As such, body butter is a great solution for those who have sensitive skin because it is often free of harsh ingredients and fragrances that can cause irritation. However, if you have very sensitive skin, it is important to patch test body butter before using it regularly. It is also a good idea to apply body butter in moderation, as too much can cause clogged pores, which can lead to breakouts. Additionally, if you’re making your own body butter, consider choosing a recipe that includes jojoba or sunflower oil. These oils are gentle, non-comedogenic, and help to prevent clogged pores.

When it comes to applying body butter, the best time is immediately after showering when the skin is still damp. This helps seal in the moisture and allows for the body butter to penetrate deeper into the skin. Additionally, it is important to regularly moisturize dry and rough areas of the skin such as the elbows, knees, and hands.

Lastly, applying body butter to the skin before going to sleep can provide an overnight miracle! This will give the body butter time to penetrate the skin deeply and repair any dryness or cracks. This will leave the skin feeling hydrated, nourished, and supple in the morning.

When purchasing body butter, look for one that is free of artificial colors, phthalates, and parabens. It is also a good idea to read the label and choose one that is made with natural, skin-friendly ingredients such as shea butter, coconut oil, essential or fragrance oils, and powdered colorants such as micas. For a whipped body butter, it is also important to add a stabilizer such as arrowroot to keep the whipped butter from “falling” or losing its light and airy texture.

Nourishes

Body butter is richer than body lotion and contains a higher concentration of nourishing and moisturizing ingredients. It provides intense hydration and prevents transepidermal water loss by forming a thick barrier on the skin. This makes it a perfect choice for dry and very dry skin types. It also nourishes the skin by delivering essential vitamins and minerals that are often lost through regular washing. In addition, it can help reduce stretch marks, fine lines and dark circles.

A rich body butter is a must-have for pregnant women, as it can help promote elasticity and prevent stretching of the skin during pregnancy. It can also help improve the appearance of scars and stretch marks after giving birth. In fact, almost any skin issue can be remedied with a well-formulated body butter!

When choosing a body butter, look for one that is formulated with shea butter, cocoa butter, coconut oil and aloe vera. This combination of nutrients will ensure that your skin is nourished and protected at all times, regardless of the season.

Some body butters may also contain other beneficial ingredients like vitamin E, jojoba oil or avocado oil. These can help nourish the skin by delivering essential fatty acids, helping balance oil production, and boosting collagen production. It is also important to find a body butter that has a fragrance you enjoy or can be customized with your favorite essential oils. In addition, a good quality body butter should contain a stabilizer to keep it from collapsing after application. Arrowroot powder is a great natural option for this purpose. In order to get the most out of your body butter, it is best to apply it before bed at night so that it can fully hydrate and nourish your skin while you sleep. You can also pair it with a powerful exfoliating scrub before showering to give your skin an even more intensive treatment. For extra pampering, try a body butter that is scented with lavender or other relaxing essential oils. This will help you relax before going to sleep and allow the body butter to work its magic while you rest.

Prevents Dryness

When you have dry skin, it’s important to use a moisturizing product that can deeply penetrate the layers of your skin and lock in luxurious moisture. Body butter can do exactly that. It’s made with natural ingredients like shea, cocoa, and coconut oil that nourish the skin to prevent dryness, and it shields and locks in moisture for supple and smooth skin. It can also help address issues like stretch marks, dullness, dark spots and uneven skin tone.

Using a thick body butter on a daily basis can keep your skin healthy and soft, even during harsh winters. It can also prevent dryness from shaving and waxing and soothe irritated skin after sun exposure or hot baths. In addition, using it regularly can prevent fine lines and wrinkles on the skin and give you a youthful glow.

A good time to apply body butter is right after you get out of the shower or bath. Pat your skin until it’s damp but not dripping wet. Scoop out a pea-sized amount of body butter with your fingers and warm it up between your palms so that it spreads easily. You can then massage it all over your body, paying special attention to any areas that are particularly dry.

The outer layer of your skin soaks up moisture while you bathe, but it slowly evaporates as the day goes by. Applying a thick body butter after your shower or bath helps keep the moisture in, especially on areas that lose hydration fast, like knees, elbows, and feet.

You can also use it before going to bed at night to give your skin an overnight treatment. This way, you’ll have hydrated and soft skin when you wake up. The key is to use body butter properly and on a regular basis, and to find a formulation that works for your specific skin needs.

Hydrates

Body Butter is a great moisturizer for dry skin, but it can also be used as a treatment for irritated areas like your hands. Applying the butter while your skin is still damp from a shower can help seal in moisture and hydrate the area. When applied daily, the rich nutrients in body butter will improve skin texture and make it healthier-looking. It is also great for hydrating your nails and cuticles.

Body butter is usually thicker than a typical lotion, so it is best to use it after a shower or bath. This helps seal in the moisture and prevents it from absorbing into the skin. When using it, be sure to apply a small amount at a time as the butter can become greasy if you use too much.

After you get out of the shower or bath, dispense a small amount of body butter into your hand and rub it evenly across your skin with your fingers. Pay special attention to dry areas of your body, such as your knees and elbows. You may want to focus extra attention on these areas during winter months when the weather is cold and harsh on your skin.

Typically, body butter is made of shea butter and coconut oil, which have intense moisturizing properties. If you have extremely dry or cracked skin, then using a body butter containing cocoa butter can give you extra protection and nourishment.

Another way to treat dry skin with body butter is to put it on your feet before you go to bed. The natural warmth from your skin will soften the butter and make it easier to smooth onto your skin. Once you have it on, you can slip on a pair of socks to keep the butter sealed in while you sleep for an overnight treatment.

While there are many benefits to using body butter, it is important to find the right product for your specific needs. Consider your skin type, hydration level, and smell preference when selecting a body butter to suit you. It is also a good idea to use body butter that is made with organic ingredients to avoid unnecessary chemicals and preservatives.

Natalie Wood Death in the Ocean Off Catalina Island in 1981

In November 1981 Natalie Wood, star of such movies as Miracle on 34th Street and Rebel Without a Cause, drowned in the ocean off Catalina Island. She was 43 years old.

Natalie Wood

In 2011 the Los Angeles County Sheriff’s Department reopened the case after Dennis Davern, the captain of the yacht Splendour, wrote his own book claiming that he heard Wagner and Wood arguing before she disappeared. In 2018, sheriff’s investigators reclassified her death as suspicious and named Wagner, now 90, a person of interest. Keep reading the article below to learn more about Natalie Wood Death.

As Natalie Wood fans know, the enigmatic actress died at the peak of her movie-star career in a baffling mystery that’s never been satisfactorily explained. The film explores her storied life and her troubled death through the words of her friends and family, clips, personal home movies and photographs, and interviews with people who worked with her or knew her in a more personal capacity.

The story starts with a little background on the young girl who was born Natalia Nikolaevna Zakharenko and became Natalie Wood thanks to Hollywood and a quick marriage. There’s also a look at her rebelliousness against the studio system and Jack Warner, and an interesting discussion of the way in which she forged her own path by choosing her own projects.

Much of the movie is a love story to the memory of Natalie, a warm and loving person who was also strong-willed and determined. The stories of the bonds that held her family together, as well as her extended circle of friends, are touching and inspiring. And there are some great photos of the actress, particularly one from the ’60s in which she stares right into the camera with that confident grin of hers.

At the end, though, we come to the inescapable subject of the night she went overboard. The boat captain, Robert Wagner, and her friend and co-star Christopher Walken offer their versions of what happened. Wagner speaks in soft, caressing tones about his relationship with Wood, and he’s obviously sorry for what happened at the end of their weekend on the yacht.

But he offers no explanation for why, according to him and others, she went in the water at night and drowned. He says she had a fear of “dark water” because her mother told her as a youngster that she would die by drowning. That’s not an explanation at all, and it makes no sense.

Even more confusing is the fact that the captain’s wife and some of his other witnesses say she went in the water because she was scared and didn’t want to go back onto the boat. There’s also the possibility that she slipped and fell into the water from the inflatable dinghy she was trying to get into.

The Power of Words

In the era of Hollywood superstars, few were bigger than Natalie Wood. Nominated for three Oscars and a Golden Globe, the actress wowed audiences with her performances in iconic movies like Miracle on 34th Street, Rebel Without a Cause, and Gypsy. But off the screen, her life was a bit more complicated.

On a November 29th, 1981, the body of Wood was found floating face down in the Pacific Ocean off the coast of California’s Catalina Island. She was wearing a flannel nightgown, blue wool socks, and a red down jacket. An inflatable rubber dingy from her yacht, Splendour, was nearby. What happened to the beloved star has never been fully explained.

Twenty-eight years after her death, a new documentary has reignited conversations about the circumstances surrounding it. The film, titled Natalie Wood: What Remains Behind, features interviews with the late actress’s daughter and stepfather. The latter, Natasha Gregson Wagner, confronts her father, Robert Wagner, over speculation that he might have something to do with her mother’s untimely end.

The day of Wood’s death, she and Wagner had invited Christopher Walken to join them on a dinner cruise aboard the boat. After a few drinks, the four people returned to their staterooms. According to investigators, at some point, Wagner and Walken got into a fight over Wood. When the argument ended, the captain of the boat, Dennis Davern, said he heard Wagner say to Walken “I’m going to kill her.”

A few hours later, a call was received at the marina reporting that someone had gone overboard from the yacht. The rescue team went out and found the dinghy in the water. The next morning, Wood’s body washed up on the beach.

The investigation into Wood’s death has been long and drawn out, but new information has emerged that is disturbing. The Los Angeles County Sheriff’s Department has reopened the case, and a newly released autopsy report revealed fresh bruises on her arms and knee, a swollen foot, and a cut on her forehead. The coroner also ruled that the injuries could have been caused by an assault.

The Final Words

In the days before Natalie Wood died in 1981 at age 43, the famed actress known for her roles in West Side Story and Rebel Without a Cause had dinner with her Brainstorm costar Christopher Walken. At some point, an argument reportedly broke out between the actors. Hours afterward, she was found dead in the water off Catalina Island. It was ruled an accident, but the Los Angeles County Sheriff’s Department recently reopened the case and named Wagner, who was her husband at the time of her death, a person of interest.

The late actress was a frequent boater, often joining her friends Dennis Hopper and Tab Hunter for weekends and holidays on their own yacht. She also sailed with fellow actor Robert Wagner, who was eight years her senior. Despite their age difference, the two began dating and ultimately got married in 1957. Their marriage was tumultuous, but Natalie continued to act and appeared in over 50 films before her untimely death in 1981.

After her death, many pointed fingers at her husband, who was 91 at the time. His version of events didn’t seem to line up with the circumstances of her drowning, and his accounts of what happened on the night of her death didn’t always add up. The bruises that were found on her body didn’t appear to be fresh, and she struggled to pull herself into a rubber dinghy, which had scratch marks.

But it’s not just Wood’s daughter that thinks her husband has something to hide. Her younger sister Lana is convinced he’s responsible for her sister’s death and has never been able to shake her conviction that he committed murder.

In a new documentary, Lana digs into her mother’s life and death with a host of interviews from those close to her, including her widower, who has consistently denied any involvement in her sister’s death. The documentary also includes a stunning new witness who says that one night, she was so afraid of Wagner’s violent rage that she ran to her neighbor’s house, knocking on the door and screaming that he was going to kill her.

The Power of Love

The Power of Love is a curious thing. It can make one man weep and another sing, change a hawk into a little white dove, and bring inanimate objects to life. It is also a Deus ex Machina in many films, used to solve all manner of problems and reunite lovers after years apart. It’s also a deadly force that can cause great harm, as shown in the case of Natalie Wood.

Wood was an Academy Award-nominated actress who had grown into a serious, mature onscreen presence, moving beyond the hurdles of child stardom to become a leading lady in the silver screen’s most classic and beloved movies, including Miracle on 34th Street, Rebel Without a Cause, West Side Story, and Gypsy. Her career was not without its high points, but it was one that was largely defined by a series of personal tragedies.

In the aftermath of her death, speculation about what had gone wrong between her and Wagner ran rampant. The couple had invited several friends on board their yacht, Splendour, but most declined due to the less-than-ideal sailing weather. Only her Brainstorm co-star Christopher Walken accepted, and the pair had a romantic weekend together on the island.

By 2011, 30 years after Wood’s death, sheriff’s officials reopened the investigation and county coroners changed her cause of death from accidental drowning to “drowning and other undetermined factors.” In 2013, a new autopsy revealed fresh bruises on her arms and knee—in addition to scrapes on her neck and face—that could have been inflicted before she died.

It was at this time that Lana Wood wrote her memoir, You Must Remember This. Although she didn’t want to be negative about her sister, she wanted to tell the truth about the troubled marriage and the problems with her sister-in-law. She would later say that she did not write the book to bring down her brother-in-law, but simply to set the record straight.

Jennifer Rush, a German-born singer and songwriter, released the song “Power of Love” in 1985, and it became a hit in Europe and reached #1 on the Billboard Hot 100. The next year, American singer Laura Branigan took a crack at it and her version peaked at #26 on the chart.

The Journey to Becoming an Electrician

If you have a knack for taking things apart and figuring out how to put them back together, a career as an electrician may be the perfect fit for you. You also need excellent problem-solving skills to overcome challenges on the job.

Electrician

Electrical contractors must follow strict regulations and safety procedures when working in homes or commercial buildings. This requires a detail-oriented mindset that ensures all work is up to code. Call Us Today for more information.

Whether you’re learning to be an electrician or just have a passion for DIY projects, it’s important to understand how electrical diagrams work. Electrical schematics use standardized symbols to represent wires, bulbs, switches and other components in an electrical circuit. The standardized diagrams make it easier for technicians to read and understand complex electrical systems.

Wiring diagrams can be incredibly detailed, depending on the type of diagram. For example, a pictorial diagram will often have photographs of actual wire connections, which can help people who aren’t familiar with electrical symbols understand the schematic. Other types of wiring diagrams may be more abstract, focusing on connections between components rather than their physical appearance.

The most common electrical wiring diagram is the house wiring diagram, which shows all of the electrical connections in a home. These connections include the receptacles, lighting and other major electrical devices in a house, as well as the connections between them. A house wiring diagram will typically include a schematic of the entire home, as well as detailed wiring diagrams for specific rooms and fixtures.

Other types of electrical wiring diagrams include circuit diagrams, which are used by technicians to troubleshoot and repair complex electrical systems. These types of diagrams are usually more complicated than the simple ones found in a house wiring diagram, and they will feature more schematic symbols to represent parts like diodes, relays, controlled switches, capacitors and logic gates.

Finally, there are ladder diagrams, which are used to show the connections between electrical circuits. These types of diagrams will use a series of horizontal lines to represent different circuits in the system, with each line representing one component. The vertical power lines will be labeled with numbers like L1, L2, etc., and the horizontal lines will be labeled with a number that corresponds to the circuit’s position in the system.

While all of these types of electrical wiring diagrams can be useful, it’s important to know which type to use for each situation. If you are installing a new receptacle, for instance, you’ll want to use a wiring diagram that includes a picture or a line drawing of the receptacle and its connection points. This will help ensure that you connect the wires properly, so that they don’t cause a fire hazard or other problems.

Wire Gauge

When choosing wire for an electrical circuit, one of the most important factors is the gauge. Thicker gauges offer higher amperage levels and are better suited to handling heavy-duty circuits than thinner gauges, which can cause overheating and even fires. Choosing the right gauge for a circuit depends on a number of factors, including how much amperage it will carry, the length of the run and the type of load.

In the United States, there are 44 standardized wire sizes defined by American Wire Gauge (AWG) or Brown & Sharpe Gage. These are the standard wires that most electricians will work with. The AWG system uses whole numbers to represent the size of a solid-round conductor, rather than fractional inches. The gauge sizes are spaced 26% apart, with the lowest sizes at the top of the range.

The AWG system defines a number of different wire diameters and physical properties, but the most critical property is the current carrying capacity. The chart above shows the maximum amps a given wire can handle, along with its thickness and other physical characteristics.

Master electrician Heath Eastman explains the importance of selecting the correct wire gauge and how to choose the right gauge for each project. He also discusses the benefits of working with UL-rated wire, which is wire that has been tested for safety.

A common myth is that higher AWG numbers equal smaller wires, but this is not the case. The physical wire size is inversely proportional to the gauge number, because of the amount of processing it takes to manufacture each size. For example, the AWG number of a 20-gauge wire is greater than that of a 9-gauge wire because it requires more drawing operations to create the thicker wire. In addition to the AWG number, wires are typically characterized by their circular mil or MCM size as well. This is a measurement of the wire’s cross-sectional area, and is more precise than diameter because it accounts for a portion of the total wire’s surface area. A free online calculator can convert MCM to diameter and gauge for any wire size.

Wire Colors

When it comes to electrical wiring, the colors of wires tell you a lot about their purpose. This is particularly true if you are a homeowner who wants to work on light switches, electric outlets, or other electrical projects around the home. Whether you are a DIY-er or a professional electrician, understanding the meaning of electrical wire color codes is essential to safety and proper wiring technique.

Generally speaking, black indicates a hot or live wire that is carrying current. This is typically the wire that runs from the breaker box to electrical devices like light switches and wall outlets. Sometimes, it may have a red stripe or tape on the sheathing. This is used for a second hot wire in 220-volt circuits and is often the switch leg connection between two hardwired smoke detectors.

White wires indicate neutral or ground wires, but this is not always the case. If a white wire is marked with black or has red tape on the sheathing, it is being used as a hot wire. It is also possible to have a third hot wire in a cable (although this is uncommon). Green and yellow indicate protective or ground wires that run from the outlet or light fixture to the ground bus bar in the electrical panel.

While electrical wiring is relatively safe when properly installed and maintained, there are still a number of accidents each year that result in death or injury. In addition to these fatalities, many of the accidents that happen involve non-fatal shocks. These are caused by improper handling of electrical wires and equipment, so it is important to understand the wire color code system and use it in conjunction with a multimeter or other non-contact voltage tester before working on any power conductor.

In addition to knowing the meaning of electrical wire colors, it is always important to shut off power to any outlet or switch before beginning work. It is also important to assume that all electrical wires are carrying current, so you should always work on them in dry conditions. If you are not comfortable working with electrical wiring, please call a professional electrician in your area for assistance.

Wire Terminations

Whether it’s soldered, crimped or using connectors like terminals and wire nuts, electrical terminations are the connection points between a cable and a device. It’s important to properly terminate cables because it allows you to transmit signals and power effectively while also protecting them from damage or interference.

When performing a wire termination, it’s important to understand the different methods and their respective benefits and drawbacks. Some common ways to connect wires include crimping, which involves compressing a metal sleeve around the cable, and soldering, which uses melted solder to secure the conductors. Crimping is the most popular method of termination because it’s fast, clean and mechanically strong. Soldering, on the other hand, can be more time-consuming and requires specific skill to avoid mistakes.

Some other types of electrical terminations include screw terminals, which secure a wire by tightening a built-in screw on the connection-side opening, and insulation displacement connectors (IDC), which pierce the wire’s insulation to create a contact with the copper conductor underneath. Screw terminals are ideal for use with thin-gauge wires, while IDC terminal blocks and modules are more suitable for thicker-gauge wiring.

Other types of electrical connections include ring terminals, spade or fork terminals, and ferrule terminals. Ring terminals are one of the most common types of connectors, primarily because they offer a firm connection with zero chance of disconnection at the stud. They’re also a good choice for busbars, terminal blocks, and feed-through-connectors.

Another type of electrical connector is the wire nut, which has internal threads that twist around the stripped wire ends to secure them. When installing wire nuts, it’s important to remember that you must always wrap each bare wire end with electrical tape before connecting them to anything. This helps prevent accidental short circuits that can cause fires. It’s also important to ensure that the wire nut is properly seated on the wire, otherwise it could fail or become loose. It’s recommended that you wear rubber gloves when handling any type of electrical terminal. This will help prevent injuries and skin burns, and it’ll keep your hands safe from sharp edges.

The Different Types of Plumbing in Your Home

Plumbing is the system of pipes and fixtures that distributes water and removes waste in a building. Plumbers install, repair, and maintain these systems. They must have a high school diploma and complete an apprenticeship program.

Plumbing

The work can be dangerous and physically challenging. It involves crouching in tight spaces and working with hazardous materials. Visit Website to learn more.

The water supply lines in a house, sometimes called the water main, carry fresh, clean water to every faucet and fixture. They are usually buried underground and made from copper, brass, galvanized steel or PVC, although some houses have older pipes that are lead or even cast iron. These plumbing pipes are the lifeline of the home, so it’s important to have a licensed plumber service them regularly to keep them in good working order and to avoid expensive water leaks.

Most homes get their water from a municipal water system. Others draw their water from private wells. Regardless of where the water comes from, most of these systems are similar: The water is pumped or stored at a treatment plant where it’s cleaned and treated to make it safe to drink. The water is then piped to the homes through a distribution system.

Water distribution systems must meet the demands of a wide variety of people and use cases, including domestic, commercial, industrial, and fire fighting needs. Hence, the complexity and cost of designing these water supply networks. They have to be planned taking into account the location of the water source, current and future demand, leakage rates, pressure losses, pipe size requirements, fire fighting flows and many other factors.

In some countries, the distribution system is owned and operated by a public entity such as a municipality or government agency. In other countries, it is privately owned and operated by a commercial organization such as a water utility.

These water distribution systems need to be designed to ensure the quality of the water at the point of use. They must be able to deal with water leaking from water lines, as well as back-flow from non-potable water or wastewater into potable water supplies (cross-connections). They must also be able to cope with the hydraulic constraints of minimum energy costs and water network capacity. In addition, they need to be designed and managed in a way that minimizes the financial costs of operation and maintenance. This is a complex task that requires the expertise of professional city planners and civil engineers.

Drainage

The drainage system takes water and waste away from fixtures, such as sinks, toilets, and washing machines. It uses downward angled pipes to play gravity’s favor and carry wastewater to the sewer line. It also includes drain traps to prevent foul odors from entering the home.

Like the water supply system, it’s important to keep the drainage pipes in good condition. Blocked drains can cause a lot of damage in a short period, so it’s essential to spot a problem as early as possible.

One way is to examine the drains themselves for signs of blockage, such as water seepage. Another is to look for evidence of structural issues, such as loose or cracked pipes, which may need to be replaced. If you suspect there’s a problem with the drains to your home, contact a plumbing company.

Plumbers have a range of tools to investigate and repair problems with the drainage system, including CCTV drain cameras. These can reveal a wide range of issues, such as stress cracks, blocked drains, tree roots, and more. They can then use high-pressure jetting to clean pipes, removing any blockages and flushing out the drains.

For more serious issues, they might need to dig up the pipe and replace it, or install a new trap or junction. It’s also important to prevent water from flowing into the drainage system in the first place, which is why it’s crucial to divert rainwater away from the house.

The drainage system is usually separated from the water supply system, with no overlapping pipes. But there are bridges connecting the two systems, which plumbers refer to as fixtures. These include things such as sinks, toilets, and bathtubs. They are where clean water enters the home and wastewater exits, so it’s important that they are installed correctly.

The plumbing system is a complex network of pipes, and understanding how it works can help you avoid any major problems in the future. It’s also a great idea to teach kids the basics of plumbing, so they know how to be careful with water and what to do if something goes wrong.

Venting

As a homeowner, it’s important to understand all the parts of your home’s plumbing system. This includes the drainage and supply lines as well as vent pipes. While most people know that drains allow waste and water to flow away from the toilet, sink or bathtub, few realize that your vent pipes play an essential role in your home’s plumbing system. The vent pipe, also known as the plumbing air vent or vent stack, regulates the air pressure within your drain pipes so that waste and water can flow easily through them. Without this, your drains could become clogged and your home may smell like sewage.

Plumbing vents prevent a vacuum from forming behind a drain line, which could cause water to be sucked back into the fixture, or even out of your home. The vent system also ensures that the water in a drain trap is always fresh and prevents sewer gases from entering the house. Without proper venting, wastewater and noxious odors would build up in rooms throughout the home and potentially poison a family’s health.

Vent pipes connect directly to the drain line or behind a plumbing attachment, like a tub or sink, and run up through the wall. There are many types of vent pipes, each with its own unique advantages, installation requirements and use-cases. Here are a few common types of plumbing vents and where they’re typically located:

The primary purpose of a plumbing vent is to maintain constant air pressure in a drain pipe. When a new drain opens, the water flows into the trap and creates a suction effect that must be filled with fresh air for the system to continue working properly. The vent system fills the vacuum with air to keep pressure balanced, and it prevents siphoning that can occur when a drain is closed.

If a plumbing vent is blocked, the system won’t be able to balance air pressure and the traps will lose their water seal. Over time, this can lead to a buildup of sediment in the drain pipes and eventually result in costly repairs or replacements. If you suspect that your vents are blocked, a quick check can usually reveal the problem. You can try running a little water down the drains to refill the traps, but if you’re experiencing gurgling noises or a strong sewer odor, it’s best to call a professional.

Plumbing Types

Whether they carry fresh water to your kitchen faucet or drain waste into your sewage system, the plumbing pipes throughout your home perform a critical function. They silently ensure your daily conveniences by connecting your fixtures to a central network that directs both supply lines and waste removal. As you may have guessed, the pipes themselves come in various shapes, sizes and materials. Understanding the difference between common plumbing types can help you spot potential problems and make informed decisions about repair and replacement options.

The most common home plumbing pipes are those used for the water supply. These can be made of copper, PVC or CPVC (chlorinated polyvinyl chloride), galvanized steel or other metals such as brass or bronze. Each type has its advantages and disadvantages, but they all work to efficiently supply clean, potable water.

Rigid copper pipe, a mainstay within the plumbing industry for decades, can last upwards of 50 years and offers corrosion resistance, which can preserve water quality. It also comes in a flexible option for tight spaces. PVC, on the other hand, is a versatile solution that can withstand high water pressure, and it requires neither soldering nor gluing to connect fittings. It’s also lightweight and resistant to rust, which can prevent blockages.

While the most common home plumbing pipes are PVC, CPVC and copper, you’re likely to find older galvanized steel pipes in some homes. These are a good choice for non-potable water drains and for gas supply lines. Galvanized steel pipes are heavy, however, which limits their use for water supply lines.

For more modern plumbing solutions, you’re likely to encounter plastic pipe in newer homes. This popular, cost-effective pipe is lightweight and resistant to rust, making it an ideal solution for many applications. It’s also safe to use indoors and outdoor, which is a huge benefit for homeowners. Lastly, it doesn’t require gluing or soldering to connect fittings, which is a big plus for many plumbers and homeowners alike. If you’re interested in upgrading your home, a plumber will be able to provide more details about your current plumbing system and help you choose the best type of pipe for your specific needs.

Understanding the Hardwood Refinishing Process: A Step-by-Step Guide

Hardwood Floor Refinishing Bergen County NJ is a labor-intensive process. You must remove all furniture and rugs, clear the floor of dust or dirt and repair any damage like holes or scratches.

Hardwood Floor Refinishing

It would be best if you also pulled up the baseboard molding along the wall-floor joint, using a pry bar (but not a crowbar) to protect it from damage and make the job easier. Number or otherwise mark each piece of baseboard to make it easier to put back together after refinishing.

Hardwood floors are an investment that add beauty and value to your home. They also provide a healthy living environment by reducing allergens and dust particles. However, hardwood floors require periodic professional cleaning and maintenance to extend their lifespan. Regular, deep cleanings help protect wood from damage, scuffs and scratches, and promote proper aeration and moisture management. This is why it’s important to choose a professional restoration company that understands the specific needs of wood floors and knows how to clean them properly.

Before sanding or applying stain to your wood floors, it’s important to thoroughly clean them. This will prepare the floor for the new finish and ensure that the refinishing process will be successful. Using the wrong cleaners or methods of cleaning can damage the hardwood and lead to long-term problems.

While most refinishing companies use some form of dust containment, there is always going to be some level of mess when working on a room. To minimize the amount of debris created during sanding, you should remove all furniture and rugs from the room. This will allow the refinishing crew full access to the floor and will prevent items from being covered in dust.

The sanding process typically involves three steps: rough sanding, intermediate sanding and finish sanding. Each step uses different grits of sandpaper to create a smooth, even surface. It’s essential to use the right sanding equipment and sandpaper for each step in order to get the best results.

After sanding, it’s important to thoroughly clean your hardwood floors again. This will remove any residual dust and dirt from the surface of the wood, ensuring that the new finish will adhere properly. It’s recommended that you use a commercial wood floor cleaner that is safe for your type of hardwood flooring. It’s also a good idea to use a vacuum cleaner with a soft brush attachment to remove any remaining dust.

After sanding and cleaning, it’s important to dry your hardwood floors. This will prevent water from seeping into the wood and causing warping or swell. To dry your hardwood floor, use a mop or cloth with a gentle cleaning solution. Once the floor is completely dry, you can apply a maintenance oil. Follow the manufacturer’s instructions for application and frequency of application to keep your hardwood floors looking great.

Sanding

Refinishing a hardwood floor is an extensive and time-consuming process. To do it properly, you must sand the hardwood down several times with progressively finer grit sandpaper to achieve a smooth, even surface. It also involves the removal of old finishes, as well as repairing deep scratches and gouges in the wood. The floor must then be stained and sealed.

To avoid the expense of a complete refinish, consider screening and recoating your floors. This method is less invasive than a full refinish, but still takes some time to complete. It involves buffing the existing floor with a floor buffer to remove dirt and grime, then adding a new layer of water-based polyurethane. This keeps your floors looking good without removing too much of the top layer of wood. It’s ideal for rooms that get a lot of use.

When sanding hardwood floors, it’s important to take the proper precautions to protect yourself and your home from the dust that will be generated. Vacuum attachments and indoor vacuums that are designed specifically for sanding will help to reduce the amount of dust that is produced. In addition, it’s a good idea to wear a mask and eye protection to avoid inhaling the airborne dust particles.

Before sanding, it’s a good idea to clear the room of furniture and other items. This will make it easier to move around the area and will prevent them from getting scratched or damaged by sanding equipment. It’s also a good idea to cover or tape over any electrical outlets, vents and window openings to protect them from the sanding dust.

The sanding and staining process will likely take two to four days, depending on the size of the room. It’s crucial to allow enough time for the finish to dry and cure completely before returning furnishings to the room.

Once the floor is dry, it’s a good idea to apply a few additional coats of finish to ensure that the color remains consistent throughout the entire floor. It’s also a good idea at this point to reinstall any baseboards or trim that were removed during the refinishing process.

Staining

Staining is the next step in hardwood floor refinishing. It can help to change the color of your floors, accentuate the wood grain and add a warmth to your home. Staining can be done yourself if you have the right tools and experience, however if you aren’t comfortable working with power tools like a drum sander or if your floors have been previously stained you will need to hire a professional.

Before staining you will need to vacuum and dust the floors thoroughly. Make sure that there are no lingering particles of dirt or dust, even the smallest speck can mar a finished stain job. Once your floors are clean, you will need to let them dry completely before proceeding. Once your stain is applied and dried according to the manufacturer’s instructions you can enjoy your refinished floors.

If you’re going to refinish your own hardwood floors, it is best to work in columns of 3-5 boards wide, instead of trying to do the whole room at once. This way you can get a more consistent appearance and avoid lap lines. Also, it’s important to work with a partner when applying stain, one person should apply the stain and the other should wipe it off, starting in the same corner and moving outward from there. This will ensure that both ends of the room look the same.

After the refinishing process is complete, your floors will need to be sealed. This will protect your investment and keep your new finish looking beautiful for longer. To seal your hardwood, you will need a polyurethane based product. This product can be purchased at any hardware store and is relatively easy to use.

Hardwood floor refinishing is a time-consuming project but it can be worth the effort in the end. By refinishing your hardwood floors you can extend their lifespan and make them look as good as new again. By following some simple preventative maintenance tips you can make your hardwood floors last longer too. Placemats at entry doors and felt pads under furniture can reduce scratches, sweep regularly to remove debris that could scratch the surface, and vacuum and dust the floors regularly. It is also a good idea to schedule regular deep cleanings by a professional to remove any buildup that may be scratching the surface of your hardwood floors.

Sealing

Sealing is one of the most important parts of refinishing hardwood floors. Unsealed wood is susceptible to discoloration and can also be damaged by water, mud, dirt and other household liquids. Sealing protects the hardwood and keeps it looking great for a long time.

If your flooring isn’t sealed, you should consider having it done immediately before refinishing. This is especially important if your flooring has been in place for a while and the finish has worn down or been scratched. The sealant will help the sanding process go much smoother and keep your new finish looking its best.

It’s important to choose a low-VOC sealant that will be safe for your home. High VOCs can negatively affect indoor air quality and make it difficult for you to breathe. A reputable hardwood floor company will use a low-VOC product that won’t release any harmful vapors into the air.

Hardwood Floor Stain

When you refinish your hardwood floors, it’s a great opportunity to change the color of the flooring. You can use a stain to highlight the grain pattern of your hardwood and give it a richer look. However, a common mistake that amateurs make is applying too much stain to their hardwood floors. This can cause streaks or blotches that aren’t attractive. It’s also important to follow the directions for your particular type of wood when staining.

Before sealing your hardwood, make sure to sand it again and remove any remaining dust. Then, apply the sealant following the manufacturer’s instructions. Once you’re done, let the hardwood floors dry for a day or two.

Refinishing your hardwood floors is a labor-intensive project that takes a lot of skill to do correctly. It’s worth it, though, to have beautiful, durable hardwood floors in your home. They add a lot of value to your property and can even increase your property’s resale value if you decide to sell. Schedule an in-home appointment with a reputable hardwood flooring company to see how our professional service can help you get the floors of your dreams.

Become a Plumber and Get Paid to Learn

Plumbing Lexington KY is the network of pipes and fixtures that conveys water and other liquids throughout a building. Plumbers install, maintain, and repair these systems, following blueprints and meeting building codes.

Pipes carry drinking water and waste to and from fixtures like sinks, toilets, and showers. Waste is typically sent to a sewer system, but can also be diverted to a garbage disposal unit.

Plumbing involves installing and repairing pipes, fixtures and other equipment that supply water or remove waste in residential and commercial structures. It’s a skilled trade that requires attention to detail and knowledge of state and local codes. A plumber must also be familiar with a wide range of tools and materials. Some of the most common plumbing jobs include fixture installation, pipe repair, drain cleaning and garbage disposal.

Before beginning any plumbing job, the plumber must prepare the work area. This includes removing any existing pipes, laying down protective sheeting and ensuring that the new pipe installation is properly fitted and sealed. The plumber must also take into account any possible future issues such as leaks or the need for expansion and contraction of the pipes.

For new construction, the plumber must set the sewer accommodation stubs in place before the concrete foundation is poured. This is done to ensure that the plumbing system will be connected to the city’s sewer line later on. The plumber must also install the rough plumbing, or the skeleton of the pipes, which includes laying out and connecting all the water supply, waste and vent lines. This phase usually takes place after the framing is completed but before hanging drywall.

Once the rough plumbing is in place, it must be inspected to make sure that it meets all state and local codes. The inspector will look at the piping, valves and fixtures to ensure that they are installed correctly and are functioning as intended. If the inspection is satisfactory, the plumber can then proceed with the final plumbing installation.

The final stage of plumbing installation is hooking up all the appliances and fixtures. This includes connecting the sinks, bathtubs and showers to the piping, testing the pressure and checking for any leaks. The plumber must also connect any gas lines if applicable and test the water for purity.

If you’re looking to become a plumber, completing a trade school program can give you the skills and experience that you need. After graduating, you can pursue an apprenticeship or find a entry-level position in the industry. In either case, you’ll be making money while gaining valuable on-the-job training.

Plumbing Repair

The plumbing industry is crucial to society, providing clean water for consumption and removing wastewater safely. It’s no exaggeration to say that daily life would be much more difficult without reliable plumbing systems. Plumbers therefore have an important job that impacts many lives – and one of the best things about becoming a plumber is that you get paid to learn on the job.

After completing technical schooling, new plumbers usually spend their first few years working with experienced plumbers to gain hands-on experience and on-the-job training. This apprenticeship can last up to three years and is often a requirement before trade schools will issue a diploma. In addition to on-the-job training, many apprentices also attend local seminars and conferences to stay current with developments in the plumbing industry. This continuing education ensures that they’re equipped to handle the latest plumbing problems and technologies.

Plumbing repair is another major aspect of the plumber’s job, addressing various issues such as clogged drains and toilets, low water pressure, and leaky faucets and pipes. Some of these repairs may require simple tools, while others could call for more specialized equipment such as video inspection cameras, pipe cutting machines, and hydro jets. It’s also important for plumbers to adhere to building codes when executing plumbing services, as failing to do so can lead to costly and dangerous consequences.

When deciding whether to repair or replace pipes, homeowners must consider a number of factors, including repair frequency, budget constraints, and long-term plans for the home. For example, if pipes are old and worn out, they might be more susceptible to leaks and other problems. In addition, if the pipes are made of unsuitable materials such as lead, they might pose a health risk.

Before the plumber arrives, it’s a good idea to clear the area around the affected pipes and fixtures. This will give them easy access and make the work more efficient. It’s also helpful to write down the problem and its symptoms so that the plumber can understand what’s happening and how to fix it. Finally, be sure to discuss the plumber’s pricing structure and payment methods before starting any work.

Plumbing Maintenance

As with anything, a plumbing system needs regular maintenance to ensure that it functions as it should. When left unattended, even small problems like leaking pipes and toilets can result in extensive damage, high water bills and other issues that may impact building occupants’ comfort and safety.

Plumbing maintenance involves a range of tasks, including inspections, cleaning, and repairs. The main goal is to catch any issues before they become major problems that may require costly repairs or replacement. This can be done by regularly checking for signs of leaks and other issues, such as low water pressure or clogged drains.

Leak detection: Using specialized equipment, plumbers can identify and repair leaks before they cause major damage. This saves water and money by avoiding unnecessary use and waste. Backflow prevention: Installing and maintaining backflow preventative devices can reduce the risk of contamination in the drinking water supply. Pipe maintenance: Keeping pipes free of debris, scale, corrosion and other buildups ensures proper water flow and prevents a decrease in water pressure.

Drain maintenance: Regularly clearing and inspecting drains prevents clogs, which can be caused by hair, food particles, or other debris that accumulates in the drain over time. Adding drain screens and strainers can also help reduce the risk of clogs.

Detecting and repairing any water leaks early on prevents costly water damage and other related problems, such as mold growth. It also helps to reduce operating costs by reducing energy usage and water bills.

Commercial plumbing maintenance is a vital part of keeping a business running smoothly and ensuring the health and safety of its occupants. Undetected plumbing issues can affect productivity and lead to expensive repairs, so it is important to regularly inspect and maintain the entire system.

Regular plumbing maintenance can be conducted by professional plumbers or by facility managers who have a strong understanding of the importance of maintaining a functional and efficient system. In addition to the benefits listed above, regular maintenance can help reduce the risk of costly emergency repairs and improve overall building safety. Contact us today to schedule your commercial plumbing maintenance service!

Plumbing Troubleshooting

When you have a plumbing problem in your home, it can be difficult to figure out what the problem is or how to fix it. Fortunately, there are clues your plumbing system will give you that can help you identify the issue and find a solution.

First, listen for dripping sounds. This may seem obvious, but it’s an important step in troubleshooting because dripping faucets waste water. Even if each drop is insignificant, over time it can add up to a large amount of wasted water. Leaking pipes can also be a major problem, especially if they’re in walls or under floors, where they could cause damage and mold. Look for damp or discolored areas in your home, as well as puddles or water damage to your wood or drywall.

In addition, pay attention to any strange smells coming from your drains. These can be a sign of a blockage or even a sewer line problem that needs to be addressed immediately.

It’s also a good idea to keep a few basic plumbing tools on hand in case of an emergency, such as hex keys, plumber’s tape, and plungers. This will allow you to make quick repairs until a professional plumber can arrive. Finally, make sure to shut off the water before attempting any DIY repairs, and always wear appropriate safety gear when working on a plumbing issue.

Knowing how to identify and address common plumbing problems can save you money and frustration in the long run. But if you’re not comfortable working on plumbing issues or if they’re severe, it’s always best to call in a professional plumber. With the right knowledge and tools, you can rest assured that your plumbing is in good hands! With regular inspections, you can nip problems in the bud before they turn into full-blown emergencies. This blog post has covered how to spot and solve common problems like dripping faucets, clogged drains, and running toilets as well as more complicated issues such as leaky pipes and sewer line problems. If you’ve identified the issue, have the proper tools and safety equipment on hand, and follow the steps outlined in this blog post, you can take care of any plumbing problem that comes your way!

Interior Painting – DIY Tips And Tricks

Painting your home’s interior is an inexpensive and quick way to upgrade its look. But a good paint job requires preparation to ensure a smooth, consistent finish.

For example, you’ll need to remove hardware like doorknobs and lifts, switch plates, light fixtures, and pictures. Then, cover anything that can’t be moved with plastic sheets. Call Painters In Delaware for more tips and tricks.

painting

Preparation Is Key

Painting a room is one of the most affordable home improvement projects that can dramatically transform your space. However, like any home improvement project, it is important to prepare well before beginning. Professional painters have developed procedures over time to ensure that their jobs go more smoothly and look better, and you can learn from them to save yourself time and frustration.

Before any paint is applied, the surface needs to be cleaned. This includes wiping down surfaces with a damp cloth to remove any dust, grit, or other debris that may affect the quality of your finished product. Using a mild cleanser (such as a solution of dish soap and water) is also helpful for removing dirt, mold, or other grime that may be present on your walls.

It is also a good idea to wipe down windows, trim work, and any other surfaces that you will be painting before starting. This will help you to get the most even and smooth results possible, and it will give you an opportunity to fix any cracks or dings in the walls or ceiling before they are painted over.

After you have completed the cleaning process, it is a good idea to lightly sand your walls with a piece of fine-grit sandpaper. This will create a slightly rough surface that can help the new paint to adhere to it, and it will also eliminate any imperfections in the wall surface.

Finally, you will want to mask off any areas that do not need to be painted (such as trim work or windows). This will protect them from rogue drips of paint and make clean-up much easier later on. Masking paper is usually available in rolls or folded-up squares and can be held in place by static electricity or tape.

It is also a good idea to move any furniture away from the walls and cover it with plastic sheeting to prevent any accidental paint spills on your furnishings. If you do not have the time to move your furniture, at least try to cover it with blankets or old sheets so that it is protected from any paint splatters.

Get The Right Tools

The right tools can make all the difference in a painting project. This is especially true for interior painting, where a quality brush and roller can be the difference between a well-done job and a mess. It is also important to purchase the correct amount of paint for your project. Experts recommend purchasing a gallon of paint for every 400 square feet of wall space. This will give you plenty of room for future touch-up work.

A tack cloth is another must-have tool for prepping surfaces before painting. This inexpensive tool removes dust and debris, allowing for better paint adhesion. Additionally, a tack cloth can be used to smooth rough areas of the wall or ceiling for a flawless finish.

It’s also a good idea to purchase some sandpaper for use with a power sander. This can be used to smooth bumps and dents in the wall or ceiling before applying another coat of primer or paint.

When choosing a paint color, it’s always a good idea to test the paint first on a small area of the wall or trim. This will allow you to see how the paint looks at different times of day and under a variety of lighting conditions. Experts also recommend comparing the color to other decor and furniture in the room to make sure it will look good.

While it may be tempting to skip this step, it is important to protect floors, furniture, and hardware with drop cloths before beginning your painting project. It is also a good idea to lay down tape to help ensure clean lines when painting around trim and baseboards. It’s important to leave the tape on until after the paint dries, as removing it too soon can cause unsightly ridges in your finished paint job.

Once you have the proper preparations and tools in place, it is time to start your painting project. The key is to start at the top and work your way down. Painters also suggest starting with a darker color, as this will help to hide any drips or imperfections.

Don’t Forget The Edges

Painting an interior is a project that requires a significant investment of time and money. It also involves moving furniture, covering items in the room, and making the area essentially unusable until it is finished. So, it is important to make sure that you get the job done right the first time. This is especially true when it comes to the corners and edges of the room. If you want your paint job to look professional, it is essential to learn how to ‘cut in’ the edges of the room properly.

When you are doing this, it is important to use a brush that is designed for edging and corner cutting. These brushes have angled bristles that allow you to get into tight spaces. When you are doing this, it is also important to take your time. If you rush, it can lead to lumpy or uneven lines along the edges of the room. Also, be sure to let the cut-in paint dry before you roll out any more coats of paint on the rest of the wall. This will help ensure that the edges of the room are smooth and do not flake or chip.

Pros usually follow a certain order when they are painting an interior, including starting with the trim before moving on to the walls. This is because it is usually easier to remove the tape from the trim than to pull it up from a wall that is already covered in paint. Another thing that you should do is to be careful when pulling up the painter’s tape. You should always do this at a 45-degree angle to prevent taking any paint with it.

It is also a good idea to keep a supply of touch-up paint on hand, as this can be very useful for any areas that you need to repaint. You can store this in plastic cups or even old glass jars like margarine containers or baby food jars (thoroughly cleaned). If you are doing a large project, it may be a good idea to invest in some small, disposable jars of the paint that you are using.

Use The Right Technique

Painting interior walls and furniture is one of the easiest ways to refresh or update the look of your home. It also offers one of the highest returns on investment when compared to other home improvement projects. Whether you are looking for a simple way to transform your current decor or want to prepare your home for the real estate market, painting is an affordable option that will give your space a quick and dramatic change.

Interior painting isn’t always easy, and there is definitely a right way and a wrong way to do it. Proper preparation is key, as well as knowing what to expect and having the right tools for the job. The last thing you want is a patchy or uneven finish that will be difficult to live with. To avoid this, it is best to hire a professional interior painting contractor who can take care of all your prep work and ensure the result is as smooth and flawless as possible.

Before beginning your project, make sure to sand down any areas that need it, and use a damp cloth to wipe away any dust or debris. You can then choose between latex and oil-based primers depending on the type of paint you are using. Both offer good performance, but there are some differences in their odors and drying times that may influence your choice.

Then, when you’re ready to begin the actual painting, it is best to work in small sections. This will help you keep from getting overwhelmed and will allow you to maintain a wet edge, which is important in avoiding streaking. Make sure to apply thin coats and allow the paint to dry completely between each application.

Lastly, it’s helpful to have a few tricks up your sleeve for any unexpected problems that arise during your DIY project. For example, if you encounter crayon marks on the wall, WD-40 will remove them quickly and easily.

Although the prospect of DIY interior painting can seem overwhelming, with proper planning and the right equipment, you can achieve a great-looking finish that will make your home look fresh and updated. Moreover, the return on investment for this type of project is well worth the effort.

DIY Carpet Cleaning Tips

Regular vacuuming is great, but deep cleaning your carpets with a professional Carpet Cleaning Orem can make them look and smell like new. Use these DIY carpet cleaning tips in between professional cleans to keep your carpets fresh and tidy.

Mix hydrogen peroxide, dish soap, and cornstarch to create a paste. Apply this to a stain and scrub with a brush. This will lighten and lift the stain,.

carpet cleaning

Baking Soda

One of the most basic DIY carpet cleaning tips is to use baking soda, which can tackle both stains and bad odors. If you have a particularly persistent smell, sprinkling the entire carpet with baking soda can help get rid of it. You can also mix it with hot water and vinegar for a more intensive deodorizing treatment.

Greasy stains are a little trickier to deal with, but the first step is to blot the stain to lift as much oil as possible. Then sprinkle the spot with baking soda, and wait for upwards of three hours to let it sit on top of the stain. After that, vacuum up the baking soda. Repeat this process as needed until the stain is gone.

Non-greasy stains, such as those from tea, ink, and wine, are easier to take care of. Sprinkle a heavy layer of baking soda over the stain, and then pour over just enough vinegar to cause it to fizz. This helps to lift the stain, and you can then scrub it with a brush and rinse with water.

You can also add more fragrant dry spices, such as cinnamon or rosemary, to your baking soda mixture for a cleaner that will leave the carpet smelling wonderful. Just make sure to spot-test the combination on a small portion of your carpet, as more acidic chemicals can damage the fibers. Once you’ve tested the recipe, you can apply it to your carpet regularly for a fresh and clean look, as well as to get rid of unpleasant odors. For example, you could do a baking soda sprinkling once a month or every time you change your garbage bag to keep the area looking and smelling great.

Borax

The carpet is plush and comfy, sure—but it’s also super absorbent, soaking up pet smells, smoke, hairs, crumbs, and dust bunnies. And unless you clean it regularly, your rugs will quickly look and smell dirty.

Luckily, borax, which is also known as sodium tetraborate decahydrate, can come to the rescue with its natural cleaning power. This old-fashioned laundry booster has fallen out of fashion over the years as people moved to detergents with fewer chemicals, but it’s making a comeback with those who want to use natural products for home cleaning.

A box of the powdery white cleaner can be found at most grocery stores, and it’s also available online. This natural compound is safe to use and won’t harm children or pets, although it’s recommended to wear gloves when handling the powder.

Mix a teaspoon of borax with water in a spray bottle and shake to combine. Add a few drops of essential oil for freshness (but avoid scents that can irritate your pets).

For tough stains, apply the solution to a clean cloth and rub at the stain. You may need to repeat this process, particularly for stubborn stains such as red wine or blood. Then blot the area with an ice cube to soak up the liquid. Next, saturate the stain with hydrogen peroxide. After letting it sit for a minute or two, blot the area with paper towels to remove the peroxide and blood. Finally, vacuum up the remaining debris.

Essential Oils

Cleaning your carpet is an important part of housekeeping, and it’s especially necessary when you have pets or if your carpet has an unpleasant odor. But you don’t need to resort to expensive chemicals to get your carpet looking and smelling good again. With some simple items you can find in your pantry or local grocery store, your carpet will be as good as new.

Using a solution of water and ten drops of essential oil, such as lavender or tea tree oil (avoid any color versions of these oils as they could stain your carpet), you can create a natural deodorizing spray that will also lift any residual stains from the carpet. Just mix a solution of equal parts water and oil, spray it on the affected area, let it dry, and vacuum over the spot.

If your carpet has blood stains, which tend to be particularly unattractive, try applying a mixture of hydrogen peroxide and water to the area. After saturating the stain, allow it to sit for a few minutes and scrub with an old toothbrush to work the solution into the carpet fibers. Then, use a paper towel to blot up the peroxide and any remaining blood stain residue.

You can also use a mixture of borax and essential oils to make a natural deodorizer. Simply combine a tablespoon of borax with 10 drops of essential oil and two cups of water. Spray the mixture onto the affected area, let it sit, and vacuum it up.

A final tip to help you keep your carpet clean and hygienic is to use a squeegee, which is typically used for windows, to remove pet hair from your rug. This tool’s special sticky surface works to dislodge hairs and other tiny particles that can easily be missed by a vacuum cleaner or a standard broom.

White Vinegar

Vinegar is a powerful natural cleaning agent that can be used on carpets to remove tough stains and eliminate unpleasant odors. It’s a common household item that can be used to clean almost any type of stain or spill, and it’s also non-toxic, making it a safer and healthier alternative to synthetic carpet cleaners.

To make your own DIY carpet cleaning solution, combine equal parts white vinegar and water in a spray bottle. Then, apply the solution to your carpet and scrub it with a brush or sponge. Once the area has been thoroughly cleaned, allow it to dry completely before vacuuming to prevent dirt and grime from re-settling in your carpet fibers.

If your carpet has an unpleasant odor that you can’t seem to get rid of, try using a mixture of white vinegar and baking soda. Pour a small amount of the solution onto the affected area, then sprinkle a little baking soda on top. The resulting bubbling is a good sign that the baking soda has successfully absorbed the smelly chemicals from the carpet. Allow the area to sit for a few hours before vacuuming it.

Vinegar can be used on a wide variety of carpet types, including those made from wool, silk, cotton, and most synthetic fabrics. For the best results, use this homemade cleaner on fresh stains that haven’t had a chance to set. However, if you’re dealing with older or particularly stubborn stains, you may need to treat them separately before they will discolor or be removed from your carpet. For example, if you’re dealing with ketchup, Gatorade, Kool-Aid, or tomato sauce stains, follow steps 1 through 5 (above), but substitute the ammonia solution for the vinegar one in step 4. You can also use this remedy to treat butter, salad dressing, cheese, eggnog, cooking oil, crayon, tree sap, nail polish, and mascara stains.

Water

If you don’t have a machine to use, the best way to get your carpets clean is with water. It’s easy to do and is safe for your family, pets, and the environment.

First, blot any stain with an absorbent cloth – such as paper towels if you don’t have any microfiber ones available. Try not to rub the stain as this can make it worse and force it deeper into the fibres. Gently blot the carpet until the liquid has been fully soaked up and is no longer visible.

Next, try to remove any remaining stains with a solution made of clear ammonia, fabric softener, and hot water. This is an effective DIY carpet shampoo that lifts dirt and is gentle on the fibers. Then, vacuum the area and apply Scotchguard to help keep it looking great going forward.

Another useful tip is to place a sheet of white vinegar in the washing machine with your detergent when you’re doing a normal load. This helps to break down any soap molecules that have been left behind, making them less likely to be re-deposited on the carpet.

One final trick that’s especially useful for area rugs that can’t be washed in the machine is to take it outside on a snowy day. Unroll the rug and beat it against the underlying snow to lift dirt and mud into it. You can also use a lint roller to get rid of any small loose particles, but be sure to check the label before using it on your delicate rugs. Lastly, be sure to allow the carpet plenty of time to dry, and don’t walk on it until it is completely dry to avoid any accidents.